Tuesday, May 29, 2012

Allison: "Gardening" according to Allison

Hello again!  If I can get my drooling under control after seeing Lisa's amazing zucchini bread, I'll start my post.  Okay... I'm good.


As Lisa mentioned, this week we're gardening!!  She also mentioned that my parents have an amazing garden.  I have always loved our backyard, but especially during Spring and Summer.  I have taken many pictures over the years of its beauty, and love the serenity that can be found there.  Since I can remember, we've had a HUGE vegetable garden.  I have many memories of weeding and watching my parents care for this space.  After a few years, they converted a large portion of this area into a flower garden.  I appreciate the time and energy that my parents have put into making their yard a place of beauty.

Courtesy of Melissa Gallo


But like Lisa confessed, I did not get this gardening gene passed on to me either.  I seem to kill everything living that enters my home.  I can look up right now and see a Mother's Day plant that has been struggling for its life near the sink, and fear for the survival of the orchid plant my husband gave me the same day.  It's okay... I accept this flaw about myself.  That being said, I thought my take on this week's theme was a little sneaky, and is probably considered cheating.  So be it.

A few years ago, I found these adorable little fabric flowers online.  I had seen them on multiple sites, but had never seen a tutorial on how to assemble them.  I figured it out, and thought I'd pass that process on to all of you.  The flower pictured is actually from a baby shower I organized last year, and only shows the four-petaled version.  I will be making a flower with five petals.  The process is so easy.  Here is what you'll need:

The basic supplies include: scissors, scrap fabric, marker/pen, yo-yo maker (optional), needle and thread and stuffing (which I forgot in the picture, but is VERY important).

If you'd like to put your flower in a pot (as pictured above), you'll need floral moss, tape and styrofoam (I found all of those at The Dollar Tree), wooden dowels (the size depends on the size flower you make), and a pot (not pictured).


These can be as basic or as complex as you want to make them.  I almost always go for basic.  Here are the steps:


Step #1- Trace 5 circles from one fabric type (for each petal), and 1 circle from a contrasting fabric (for the center of the flower).

Step #2a- If using a yo-yo maker, skip step one and cut around yo-yo maker and begin stitching.  Otherwise, begin a basic basting stitch around the edge of the circle.

Step #2b- This is how your fabric should look after stitching around the edge.

Step #3- Insert enough stuffing to cause a little resistance when thread is pulled tight.  Secure thread by stitching through the center multiple times.  Tie a knot to complete petal.


Step #4- Thread the five petals together by stitching through the middle of each ball.

Step #5- I'm a big fan of the glue gun, so I glued the middle ball to the 5 petals.  It can also be stitched in.  Cover a 1/8" wooden dowel by placing a small amount of glue on the tip, and wrapping floral tape from top to bottom (securing with more hot glue).  Finally, secure the dowel to the flower by gluing the tip and inserting it between two petals.

That's it!  Pretty easy, right?  I've also made larger flowers and used a 1/4" dowel (found these at Joann's).  I love mixing smaller flowers with bigger flowers in the same pot.  So fun!

I hope you've enjoyed my type of gardening.  Can't wait to see what Sara has in store for us tomorrow!  She actually knows how to keep plants alive.  See you next week!!


Allison


Monday, May 28, 2012

Lisa: Gardening


Gardening!!
So the theme this week is gardening which I stink at. I’ve been trying to think of anything I could post about gardening. My parents are both terrific gardeners and have a fabulous vegetable garden, flower garden, fruit trees, berry bushes and more. Their yard is a beautiful lush paradise which I love and my children now love, as well. You’d think with that kind of upbringing I’d have more talent and a beautiful garden myself. I don’t. But part of that isn’t my fault. We have these beauties to keep us company.
Now, don’t get me wrong. I love the deer and occasional elk that we see on our property but they sure make gardening a challenge! I know there are plants that the deer won’t eat but the ones I want seem to also be the ones they want! We attempted a vegetable garden a couple of times but the deer nipped away at everything so that our produce seems to be very slim! Luckily for us, they’d miss some of the zucchini because of the large leaves (I think that was why, at least!). So I am tweaking the theme to fit my post. Gardening!!Zucchini!!
I have many recipes for this wonderful vegetable. A lot of them involve the grill for some savory dishes but one that I remember from growing up is a chocolate zucchini cake that my mom would make. It was so good and you couldn’t taste the zucchini which I liked since my childish palate couldn’t stand vegetables! I don’t have permission to give out this recipe from my mom (really, I didn’t even ask!) but I did concoct a chocolate zucchini bread which I think is fantastic and similar to her cake!! The key to this is the chocolate chips so don’t skimp!
Chocolate Zucchini Bread
3 cups flour
2 teaspoons ground cinnamon
1 teaspoon baking soda
½ teaspoon baking powder
½ teaspoons salt
½ teaspoon ground cloves
2 cups sugar
2 eggs
2 cups shredded zucchini
½ cup oil
¼ cup cocoa powder
1 teaspoon vanilla extract
½ cup buttermilk
1 bag of milk chocolate chips, divided
Preheat the oven to 350 degrees. In a bowl, combine the flour, cinnamon, baking soda, baking powder, salt and cloves. Set aside. In another bowl, mix the sugar, eggs, zucchini, oil, cocoa powder, vanilla, and buttermilk. Add the flour mixture and stir till just combined. Set aside 1 cup of the chocolate chips. Stir the rest of the chocolate chips into the batter. Pour the batter into 2 greased loaf pans. Sprinkle reserved chocolate chips evenly over the two loaves. Bake for 55 minutes. Let cool before slicing! Delicious!
Here are some of the unfortunate runners up in my attempt to make some thing for this post!
On the left was a zucchini cake with feta which was delicious but a little too doughy. In the middle is a lemon zucchini cookie that was really good and that my teenage boy ate quite a few of. Maybe with some tweaking she'll make it! And on the left is a zucchini brownie which just didn't cut it. I had high hope for them all. So sad, so sad!
What are your favorite zucchini creations?
Lisa

Friday, May 25, 2012

Shauna: Ice Cream Social

   
photos from www.thekitchn.com


Summer and ice cream go together like Anne Shirley and Gilbert Blythe.  They were made for each other.  They two are the quintessential team of summer vacation.  I got an ice cream attachment for my Kitchenaid for Mom's Day (!!) and we also own a waffle cone maker (I know, it's amazing).  So you can image I've been going a little crazy with ice cream recipes.  So far I've made vanilla bean, strawberry, and french vanilla M&M.  I'm hoping to try this chocolate peanut butter ice cream below for our Sunday dessert.


What is your favorite homemade ice cream recipe? 

Thursday, May 24, 2012

Katrina: Summer Bucket List

I attended a Stake Relief Society activity for our church a couple weeks ago and was shown this awesome idea:  A Summer Bucket List

Growing up, one of my favorite things to do in the summer was go camping, and go to the beach, and run through the sprinkler, and eat popsicles, and go to the park, and play basketball in our street, or baseball, and have a BBQ.  Oh wait, that's more than one thing...

Well, with this "summer bucket list" it gives us a chance to write down all those fun things we want to do, even new activities we want to try, in a cute, simple way.  Here's how we put one together (you could do one lots of different ways).

 We bought a plastic planting bucket.  The clothespins are a must, you will see, soon.  Then, because I do not own a cricket to make fancy letters or anything, and I didn't want to attempt it myself, I bought these foam sticker letters and some foam sticker stars.

I decorated the bucket with the help of my children.

They worked hard on it!

Here is the finished product!  What to do with the clothespins: Have the family get together to decide on some activities they want to do during summer.  Then write an activity on each clothespin.  During the summer, when you actually do the activity, put the clothespin in the bucket!


Happy almost summer!

Katrina

Wednesday, May 23, 2012

Sara Jane: Bird Feeders

Summer hasn't quite kicked in here in the Willamette Valley.  This week it has rained more and harder than I've seen in a long time.  Don't get me wrong....I LOVE the rain...I really do.  It's just that I haven't had much inspiration when it comes to summer.

When we moved into our little home a few years ago, the yard was COVERED in beautiful flowers, bird baths, and all the cutesy yard ornaments you might expect from an older couple.  Since we've moved in, however, a few things have happened:  (1) like I have mentioned before, I sorta stink at gardening so most of the beautiful flowers had to go and were replaced with plants (mostly herbs) that were a little less upkeep; (2) we downsized to ONE bird bath.  The others found their way to my parent's home or were re-purposed; and (3) ALL the little trinkets around the yard have either been broken by my busy babies or thrown away by their tired mother.

There was, however, one part of the yard I adored....4 birdhouses that are placed neatly around the backyard.

This picture is completely unretouched.  Yes, that is why I live in Oregon.  BEA-U-TI-FUL!

Today, while I was outside playing in the mud with my babies, I noticed, again, the many, many birds around my home.  They always make me smile.  They actually live in the pleasant little houses and each morning we get to wake up to their lovely songs.  Their houses are good for two reasons....Eating and Sleeping.  Since their wood houses are too high for me to reach, I thought I would make some bird feeders to stick around our yard so the sweet little birds stay nearby.


Here we go.  What you will need:


1.  First, I prepared my milk jug by cleaning it and letting it dry.  Next, I drew a circle around where I wanted my lovely daughter to cut.


2.  Next, I had my daughter (with my assistance) cut the hole out.  After she was done cutting, I went back around it to make sure it was fairly smooth.  I definitely wouldn't want to hurt the little bird's fee.


3.  I next tied my twine to the top of the jug making sure it would not slip off.  Wire may be used for this part, too.

4.  Next, I filled the jug with bird seed (I bought the inexpensive bag from Walmart.  I am pretty sure birds aren't too picky about what they eat.).  Then I tied it securely to my apple tree.


After finishing my lovely milk jug bird feeder, I came across an old glass light globe that was in our house when we moved in.  I planned on taking it to Goodwill but not anymore.

Using steps 3 and 4, this light fixture....


became this lovely bird feeder.


I hope our feathered friends will enjoy the little treats we have added to our yard.

If you're up for making a treat for the little humans around your house, here is a yummy looking popsicle that I will definitely be trying if it ever decides to warm up around here.

Loves

Sara Jane


Tuesday, May 22, 2012

Allison: Water Fun + Cool Treats = Summer

Welcome to another week!  Last week's theme was so fun!  A big "thank you" to all of those that took the time to comment about our blog!  We're so glad to know it's being enjoyed.  I know we're having fun, if nothing else.  :)

This week's theme was a little harder for me to relate to.  I'm no longer teaching full-time, and don't have any school-aged children, so being creative with the theme "summer kick-off" was a little tough.  Plus, I live in Arizona, where the temperature has been in the hundreds for multiple days now.  While others are waiting for it to warm up, I'm looking for a single cloud in the sky to give relief from the heat.  AND don't forget that I'm 6 months pregnant... better planning next time.
Sara, Gordon (Katrina's husband) and me.  I look adopted.

So instead, I thought to myself, "Self... what does summer mean to you?".  Growing up in Oregon, summer meant a few things: humid days, living in our bathing suits, playing on the slip 'n slide in the backyard, sneaking otter pops from the freezer in the garage, riding bikes in the cul-de-sac, and sleeping under the stars on the back deck.  So many good memories with my family!  For this week's post, I'll draw inspiration from two of those memories listed above.

Back to the pregnancy thing... I CRAVE cold things when I'm pregnant.  I joke that my first daughter is half milkshake, because I think I had at least one a day while pregnant with her (hence the crazy weight gain).  This pregnancy, I've tried to be a little more conscious of my sugar intake.  So I thought I'd share a low-fat, low-sugar version of this cool treat.

I found the Skinny Oreo Cookies and Cream Milkshake here.  Their picture turned out way better than mine, so I'm borrowing it.  Any excuse to buy Oreos...


The recipe was so easy to put together, and tasted great!  I didn't even feel guilty drinking it.  We don't have anything but almond milk and whole milk in my house, so I substituted with almond milk.  It's unsweetened, taking even more sugar out of the shake.  "I" was a big fan of this too...definitely a treat we'll have again!

Finally, I think that summer is synonymous with water fun.  The other day I had my first experience with an essential Arizona summer activity: the splash pad.  There are a bunch around here, but I'd never tried one.  But now that I have a kid who LOVES to be outside, I had the motivation I needed.


But there's another reason that we'll probably be visiting a splash pad again in the near future.  This is what happened for 2 1/2 hours after we got home from our water fun:


But I realize that splash pads aren't everywhere.  So I looked on trusty Pinterest, and found a couple of fun ideas that I'll probably try.

We all know that water balloons are fun.  But they take a lot of work, and then you have to clean up all those little balloon pieces.  I love the idea of sponge balls!  A great tutorial can be found here.

Next, I LOVE this sprinkler idea using only a soda bottle and $5 male to male adapter (that according to Pinterest can be found at Lowe's.  There was no actual link from the picture).  Hang it from a tree for tons of outdoor fun.  Brilliant!

I hope the rest of you enjoy moderate weather, while we sweat to death here in AZ.  But the end of the summer means a new baby in our household, so I'll enjoy the time I have with little "I" and my husband until then.  Have a great week!!


Allison


Sunday, May 20, 2012

Lisa: Summer Activity Board and Cool Summer Sleeping Bag!!

Summer Kick Off!!!

This week our theme is a great way for me to start thinking about all the upcoming summer and the fun that it can be!!  One thing my husband and I have found to help motivate our children and to help organize our summer is a Summer Activity Board!  We let the kids think of activities and places they'd like to go near our home that are reasonable (we did have to nix the deep sea diving off their list!).  We then have them write their ideas on a poster board and keep it up where we can all see it.  Throughout the summer, we make plans to do an activity whenever we can and whenever chores are done.  It helps to make sure our summer doesn't pass us by without us getting anything done!


One of the children didn't get the idea that this was summer activities!  The ice fishing might have to wait till next winter!!


So my craft for this week is for a summer style sleeping bag made out of one twin sheet and a pillowcase.  With our summer comes a lot of family camping trips, sleepovers, summer camps, and sleeping out under the stars. All of which need a sleeping bag.  We have sleeping bags for each of the children but sometimes it is just too hot to sleep in them!  I have an old flat sheet that lost it's matching fitted sheet so I thought, why not?  A sleeping bag made out of a sheet would be so much better!  It is really a simple project and very good way to use your old bedding!  I was slightly embarrassed at how plain my sheet was so I went to Walmart and got a twin flat sheet for only $5!  Not bad! 


 I also purchased a matching pillowcase at 2 for $5. 

Materials:
1 pillowcase
1 twin sheet (for children or larger for taller people!)

Steps:
1) Fold sheet in half lengthwise with the inside out and cut to desired width.  Hem raw edge.
2) Sew up the newly hemmed edge and one of the ends.
3) Attach pillow case to the center of the unsewn end. 
4) Turn right side out and you're done!

I did go a step further, though, and changed the opening of my pillowcase so that I can just fold up the sleeping bag and keep it in the pillowcase when not in use.  To do this, I opened the seam on one side of the pillowcase.  Then I hemmed that newly exposed edge.  Next I cut off the cuff of the pillowcase and sewed that end shut.  Finally, I just attach the pillowcase to the sheet (like in step 4 above).    


Very simple and easy to put together but I think it will be really useful!  It would also make a great sleeping bag liner!  Here it is all folded up.


Kind of cute, isn't it?!I thought about putting straps on it so it could double as an overnight bag but I don't like the idea of long cords near my baby's neck at night!!  Call me crazy!  And of course, my other sweet children wanted what their sister got so I used what I had on hand to make them something.  First up, the cute IKEA fleece throw turned summer sleeping bag for my perpetually cold baby.

Super cute and perfect for her little self!!  Then of course, for daddy's little boy:


Go Cougars!  This is just made from two fleece panels that fabric stores sell.  We've had these floating around the house for awhile now.  Finally they have a purpose!


 Perfect!!  How are you and yours kicking off summer? 
Lisa


Friday, May 18, 2012

Shauna: A Bike Ride with Tolstoy

First off can I say I'm so grateful for all those who have served our country and defended our freedoms! I had two courageous grandpas who served in WW2, and my husband has the sweetest grandpa who lost his hearing in the Korean War.  I'm so grateful for their sacrifices!!

That said, Memorial Day not only makes me think about how wonderful this country is, but it also invokes thoughts of family BBQ's, putting off finials, planting the garden and bike rides in the warm summer's eve air.  So this Memorial Day, why not take a long and wonderful bike ride, and take your favorite war novel with you while you're at it (I chose War and Peace).

Bike ride picnic


1. highgate shirtdress 2. Barneys New York Sun Hat 3. Laduree french macarons 4. War and Peace   5. Bowery Lane Bicycle 6. Leather Rose Watch 7. Banshee 8. Row X 9. Pratesi

Thursday, May 17, 2012

Katrina: For Memorial Day

WARNING:  This post does not have pictures... yet...

So far this week, we've seen a lot of delicious recipes, so I thought I'd go along with it.  So, here is a very yummy fruit slushy drink that I tried at a recipe group I used to go to.  The one who shared the recipe called it "Thanksgiving Slush" because her family always had it at Thanksgiving.  But, I think it would work perfectly on Memorial day as well.  Here is the recipe:

Thanksgiving Slush

Ingredients:
Lemon Ice:
2-3 C Sugar                                                     2 Pkg Frozen Raspberries
8 C Water                                                        1 can Pineapple Tidbits
3/4 C Lemon Juice                                          5 Bananas, sliced

Directions:
1. Boil 4 cups water and sugar together for 5 minutes.
2. Use 2 C sugar if using sweetened raspberries, 3 C if fresh.
3. Add remaining 4 cups cold water and lemon juice. Mix together and freeze (overnight if possible). Set out for 1 1/2 hours before serving to thaw.
4. Add raspberries, pineapple and bananas. Stir together and serve!

(If you'd like to see a picture, I will hopefully be able to post it tomorrow... or soon after...)

But, believe me, this is worth trying!!!!!!!!!!

So, enjoy this delicious fruit drink along with all those delicious food recipes that have been posted!

Katrina

Tuesday, May 15, 2012

Allison: Patriotic Wreath Tutorial and Giveaway

  **Giveaway is now closed**
Wreath is available in our Etsy shop: http://www.etsy.com/shop/fivecraftysisters

Hello, again!  I hope everyone had a relaxing Mother's Day!

I'm so excited for this week's theme!  I LOVE Memorial Day!  I consider myself a very patriotic person, and relish any opportunity to be reminded how blessed I am to live in this free country and to celebrate all those who protect/have protected that freedom.

For this week's post, I did some "research" on Pinterest and found this cute wreath made of tulle.  There was only one thing wrong with this wreath:  I am WAY too lazy to tie that much tulle!!  But it did remind me of a scrappy fabric wreath I attempted for Halloween last year.  I knew I had most of the fabric I would need, and knew where to get the rest of the supplies for CHEAP.  Here's what you need:

* I found this 9" wreath at the dollar store.  Perfect!  A little small, but that means less work.  :)

* Ribbon for hanging, if you choose (dollar store, again).  I have a wreath hook, so I didn't use mine.

* The stars I found at Joann's for $.29/each!  I only ended up using one.

* Fabric.  This is a great project to use your extra scraps of fabric.  I had all but the blue, which I found at Joann's in the Fat Quarters section.

This project is great, because there's no right or wrong way to do it.  I chose 3 different fabrics of each color.  I cut the pieces 1 1/4" wide and 9-10" long.  Some were thinner or shorter, depending on what scraps I had.  Anything shorter than 9" was a little harder to work with, but still doable.

Next, start tying!  I double tied one piece of each fabric, alternating between red and white.  If you look at the wreath as a clock, tie red and white from 12 o'clock to 9 o'clock (or 3/4 of the wreath).  Then tie your blue pieces the rest of the way.

You can nest the knots together if you don't want as much of the wreath showing through.  Or you can spray paint the wreath white before you start tying fabric.  (I did this with my Halloween wreath and it worked great!)


That decision might be the toughest part of this project.  :)  I liked it both ways, but decided to paint my little star and hot glue it on.  Multiple smaller stars could be cute too.

**THE GIVEAWAY**

Okay... now the fun part!  Leave a comment below answering one (or both) of the following questions:

* What do you like most about our blog?
* What would you like to see more of on our blog?

 If you aren't one of our Facebook friends, I'll also need your email address included in your comment (or you can email it to us at fivecraftysisters@gmail.com).  You have until Sunday night to enter.  Good luck, and Happy Memorial Day!!


Allison


Monday, May 14, 2012

Lisa: Memorial Day

I hope everyone had a fabulous Mother's Day!  We had a very nice time here.  The weather was perfect and the company was great!  I received some wonderful presents from my children but my favorite is what I force them to give me every year: pictures!  I make them get ready for church early and let me take pictures of them.  I remind them that it is Mother's Day any time that they feel like not smiling or like not having their sister's hand on their shoulder!  Awesome.

As you can see, my plan always works extremely well.  Ugh!

Well, three out of the four smiling and with their eyes open?  I'll take it!


For this week, we've decided on the theme of "Memorial Day" for our posts.  Memorial Day is traditionally meant to honor our veterans who have fallen.  Our little city does a service at our local cemetery that is great for honoring the sacrifice of our veterans and for us to talk with our children about war and armed forces and patriots.   For me, though, Memorial Day has come to mean even more.  It is a time to gather with family and friends and neighbors and celebrate what it means to live in this great country!  It also marks the beginning of the summer season.  In our family, Dad would prep and plant his huge backyard garden.  It meant, too, that school would get out soon!  With my family now growing older, we love to mark this holiday with camp outs, BBQs, hikes and generally just being outside!  So I thought a post on some of our favorite BBQ dishes would be a good idea!

First up: Broccoli and Ramen Noodle Salad
This may be my favorite salad!  It is so tasty!  And yes, it is very similar to a salad made with cabbage but the dressing is very light and the broccoli tends to stay a lot crispier than the cabbage does.  I first had this at a good friend's birthday party but the bringer of the salad wouldn't give up the recipe.  I turned to my favorite allrecipes and typed in the ingredients and there you go.  Found it!!  My only changes to that recipe are that I use about six green onions not the whole bunch and I use two 12 oz. bag of the broccoli slaw instead of the one. 

Next: Fruit Salad
  This is also very light and it is very simple, as well.  I just use the fruit I have on hand.  Chop up the fruit and add a little squeeze of lemon to keep those bananas from going bad, then mix in a small carton of your favorite yogurt (flavor doesn't matter) and enjoy!  Easy and healthy!

And finally, the main course:  Grilled Tri Tip
 

Many years back, my husband brought some sliced tri tips home from a trip to Costco.  I had never worked with tri tips before and was unsure how to treat them.  He found a recipe and grilled them up.  It became our new favorite!  We love these!  The flavor of the marinade and the tender cut of beef is fantastic!


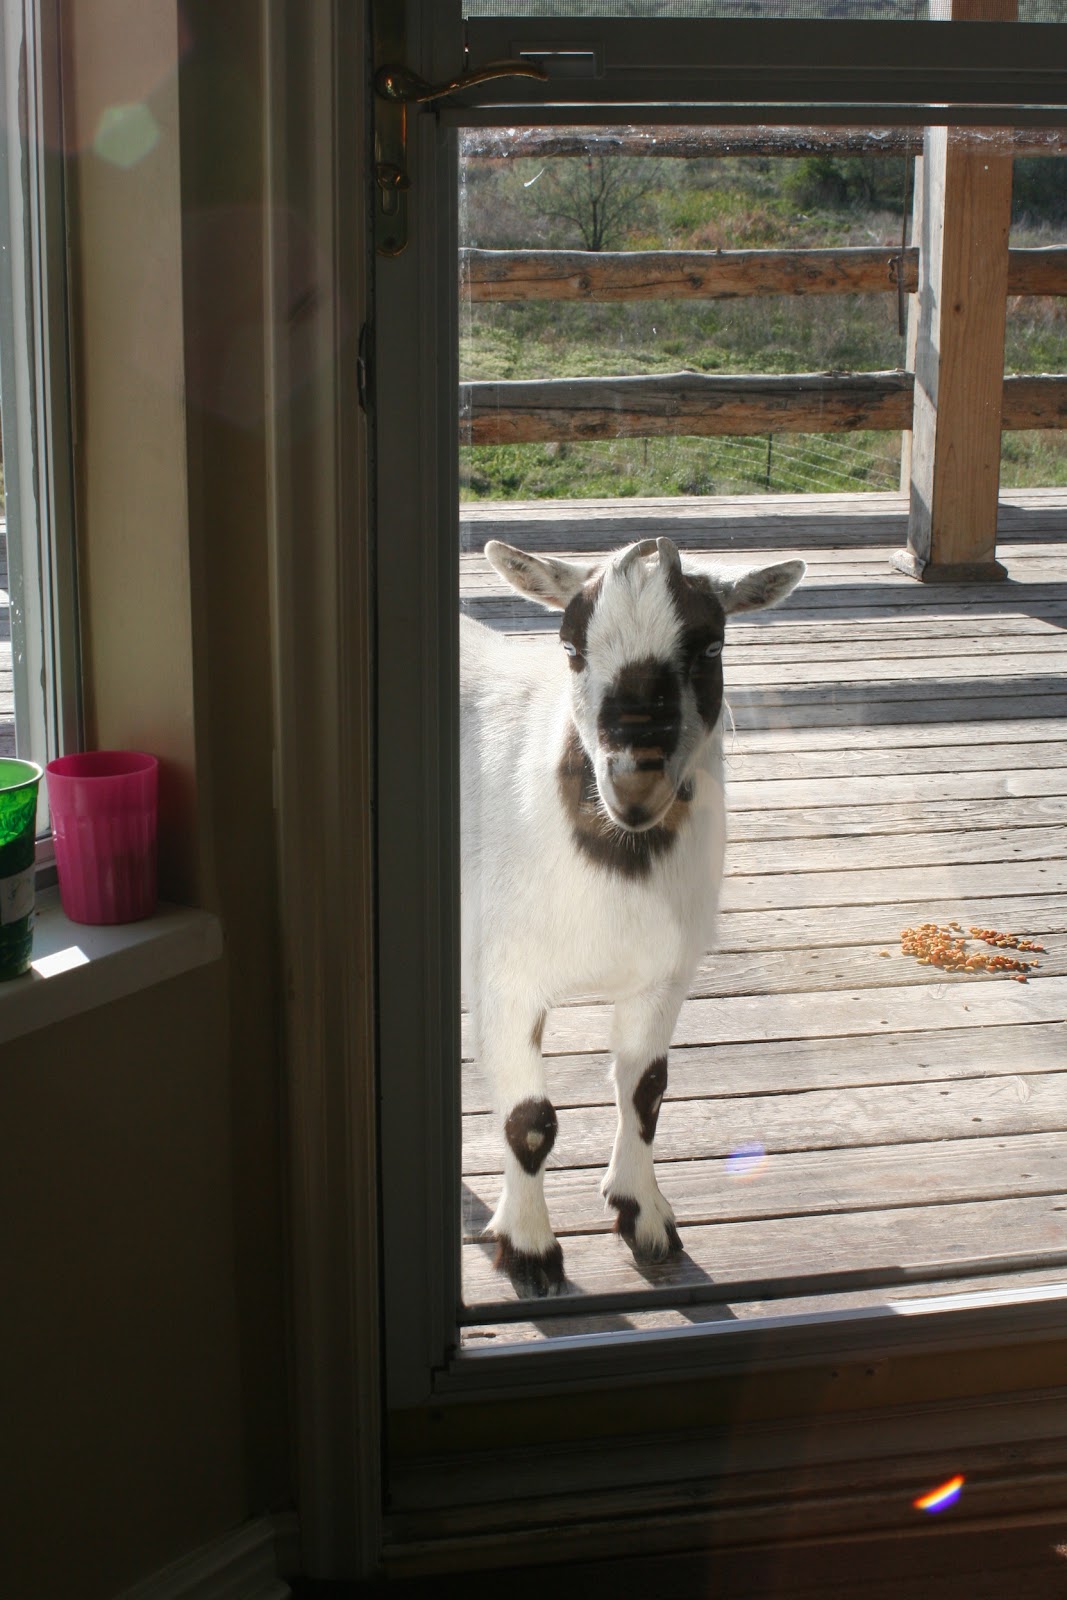
So here is our BBQ.  We also like to grill up baby potatoes.  All very delicious!  Everyone loves these recipes!  Even the goat!

Sorry, Jimmer. None for you!

Lisa