

Isla and I spend our days doing pretty basic things: cleaning, shopping, watching Toy Story 3. That's about it. But anytime we do venture out of the house, I face the same dilemma: Arizona heat and a hot car seat. Luckily, Isla doesn't really seem to mind the heat as much as her pregnant momma does. Lately I've really wanted to fix the hot car seat problem, but have been pretty lazy about making her one of the really cutesy car seat coolers I've seen on Pinterest. So I decided to embrace the laziness and make the most basic one I could that would still get the job done. It took me a total of about 10 minutes and will give her all the relief of an overly-embellished version.
Before I describe the process, I should probably explain a car seat cooler, if you haven't already figured out its purpose. When you leave the house, you grab the cooler and take it with you. Once your little one is out of the car seat, you place the cooler in the car seat, tucking the straps with those hot little metal buckles underneath the cooler, and go about your planned activity. Once you return to the car, you remove the car seat cooler and place your child in the nicely cooled seat. Genius! Okay, here's what you'll need to make your own:

The towel I bought was $3 at Walmart. Can't beat that! I would have preferred to use smaller packs, but these will still work. I pictured the colorful little coolers because I thought they were so stinking cute. Isla was a big fan of them too. :) These could also be used in a smaller version. Here are the four easy steps to make your cooler:

#1- Fold your towel hot-dog style (or the long way), and then cut in half. Technically this one towel can make two coolers. Maybe one for mom's seat too. :) Next sew the top closed after inserting a ribbon or some kind of strap that will be used to hang the cooler from the headrest.
#2- Sew the opposite end closed.
#3- Measure the length of the towel, and divide by three (or however many packs you plan to use. Smaller packs may need more "pockets".). I used a disappearing ink pen for marking.
#4- Sew straight lines the width of the towel to create your pockets and insert your packs. If you'd like to sew a little strip of Velcro to keep the pockets closed, you may want to do that before you sew the lines across. I figured it would be hanging and the packs would stay put, so I didn't add any. And... I'm lazy.

I realize that most of you probably aren't experiencing the kind of heat we are here, but hopefully this tutorial may still be useful in some way. I know that my little Isla will enjoy the fruits of my lazy labor. :) I hope you're all enjoying your outdoor outings and these Summer months! Have a great week!!
(Don't want to make your own? I'm now selling them in my Etsy shop.)
****UPDATE- 5/30/14****
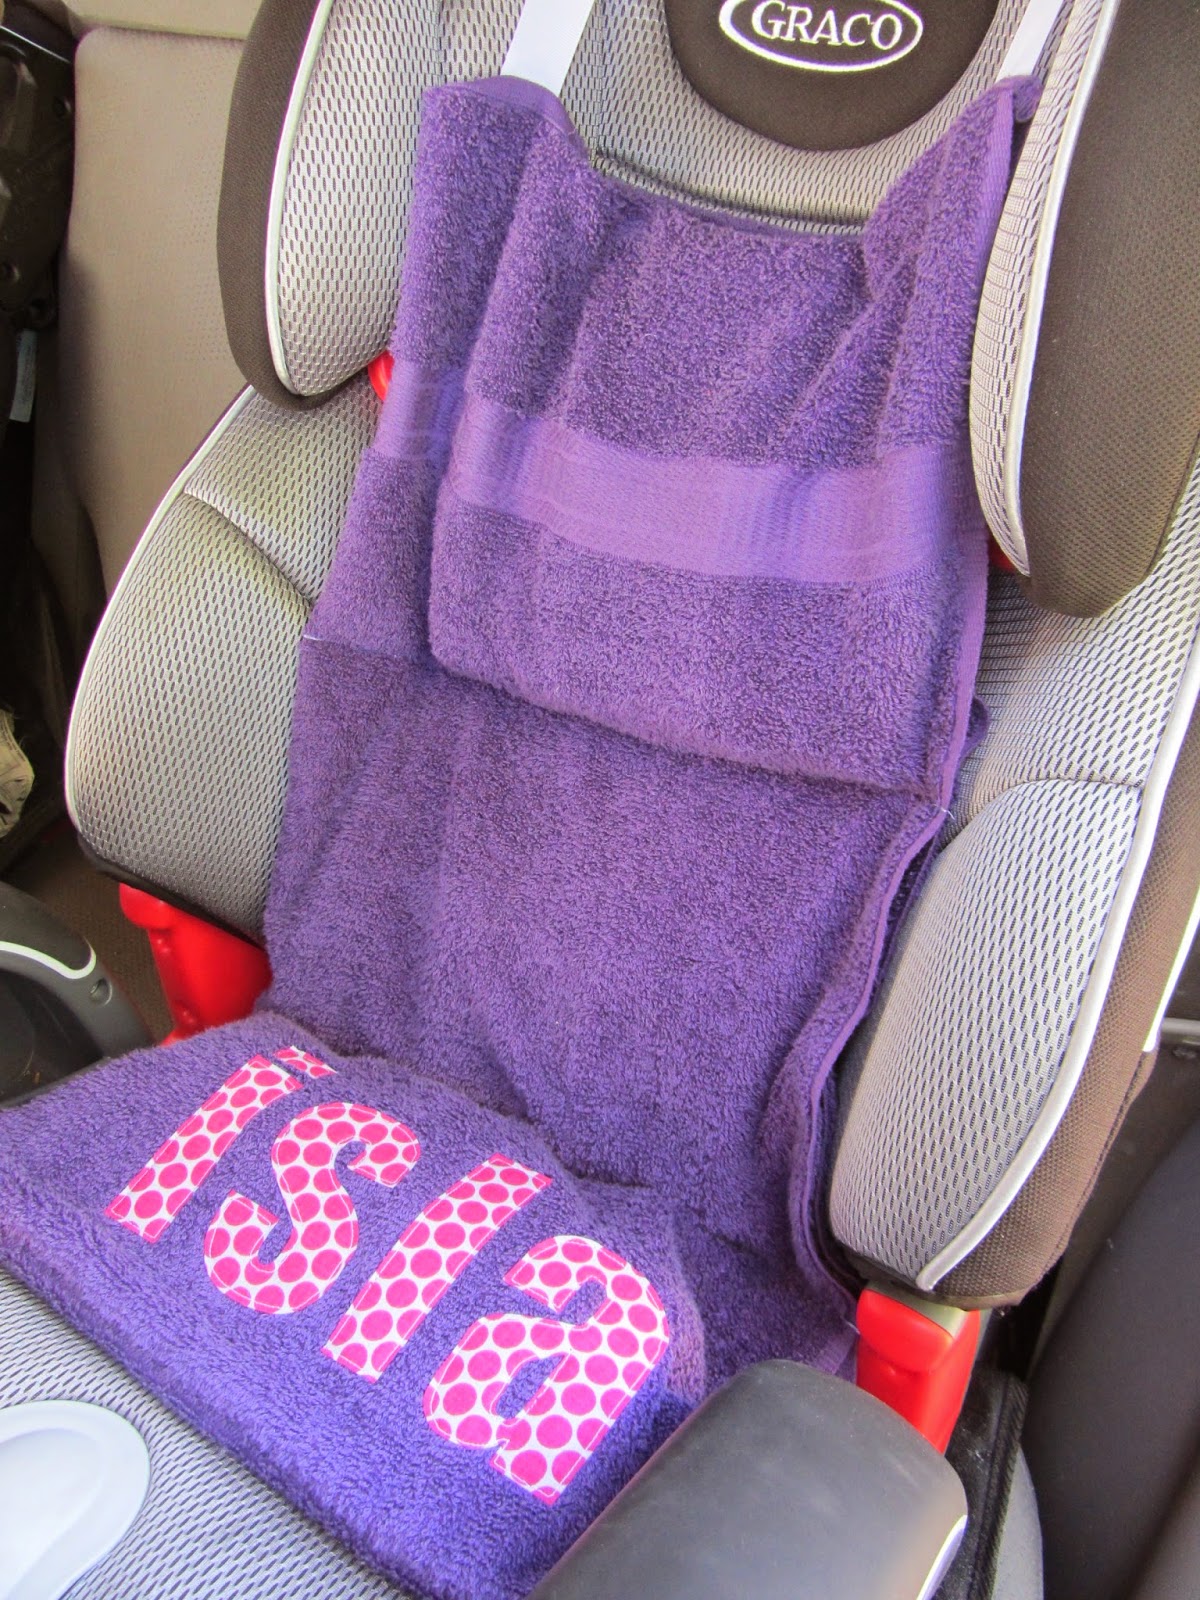
It's been almost two years since I wrote this tutorial. It has had almost 3000 views, and I have heard some feedback from those that have used it. I have made only slight changes to the coolers I make now (like hiding the seams), and have enjoyed adding a personalized element. Here's the new cooler I made for my now almost four-year-old:
I've also enjoyed playing around with color combinations with custom orders in my Etsy shop.

Thanks for letting me share!! :)
Allison
I am so going to make this! I think I can even handle the sewing!
ReplyDeleteGood! I'm positive you can. It's the easiest thing I've ever made. :)
DeleteLove it! I am going to make three of them for my little babies. Asher is my biggest complainer in the car when it is hot. This will be perfect! Thanks!
ReplyDeleteWe tried it out today for the first time, and it worked great! The hardest part is remembering to use it once you get out of the car. I forgot the first time, but then remembered the next time we were out of the car. :)
DeleteHow neat!! I'm going to do this for my 16 month old. She hates getting in her hot seat after it's been in this hot Texas sun! Thanks for this trick!
ReplyDeleteThank you so much for posting this! I found you on pinterest. I'm totally going to do this for my two toddlers. We live in El Paso,TX and it has been in the 100's for the past few weeks. They scream anytime they have to get into the car so this will be great for them.
ReplyDeleteI'm so glad you found us, Natalie! Welcome!! This little cooler has been great for me already. My little one can't complain too much yet, but I'm sure this will save me from hearing a lot of whining. :) I hope this helps your little ones too!!
DeleteSmart!! Why did I not know about these when I had little ones in Arizona summers?! Such a good idea, Allison!!
ReplyDeleteI'd never heard of these. Perfect for Florida! Thanks for the tip.
ReplyDeleteI've wanted one of these but I am so cheap when it comes to everything. Now I can make my own! Sounds easy enough!
ReplyDeleteIt's SUPER easy! If you can sew 4 straight lines, you're pretty much done. :) Glad you found us!
DeleteAs a Certified Child Passenger Safety Technician, I would not recommnend this to anyone. The reason is because nothing extra should be added to a seat and nothing should be underneath the child. Maybe this can be used to cool off the seat before you put the child in it,but I would remove it before you put them in the seat. Although this is a great idea, it is not entirely safe. Basically we don't recommend you use anything that did not originally come with the car seat. For more info. on Car Seat safety you can go to safekids.org.
ReplyDeleteSorry! You must not have read the explanation I gave in the post. This is only placed in the car seat when the child (and parent) are out of the car, and it is sitting in the hot sun. Once the child is getting back in the car, the "cooler" is removed for the top of the seat, leaving a cooler area for the child to sit, instead of scorching hot metal buckles.
DeleteHere's where I explain it in the post: "Once your little one is out of the car seat, you place the cooler in the car seat, tucking the straps with those hot little metal buckles underneath the cooler, and go about your planned activity. Once you return to the car, you remove the car seat cooler and place your child in the nicely cooled seat."
DeleteHmmm, someone didn't read the post :)
DeleteThis is fabulous! We live in the Midwest and no one really associates our climate with horrible heat, but the summers are stifling! We have just recently "cooled off" to the mid-to-high 90's, along with humidity that makes you cringe. I am so lucky to have found this on Pintrest... my 20 month old thanks you too!
ReplyDeleteShannon... I'm so glad you found this too! My 22 month old doesn't even know what a hot car seat feels like. I think I'm spoiling her. :) True the heat is horrible here, but I'll take a dry heat ANY day over heat and humidity. I hope this helps!! :)
ReplyDeleteI finally got around to making it! My little bug loves it! Thanks so much for the clear instructions! You can see it here...
ReplyDeletehttp://craftsbycj.blogspot.com/2012/09/car-seat-cooler.html
CJ
Two from one towel.....perfect. One for Mommy's car, one for Grandma's car. ;0
ReplyDeleteI know... I'm making myself one this year. :)
Delete-Allison
this may be a silly question , i read and re-read your instructions but didnt see it,what size towel did you use? was it a bath towel or hand towel?
ReplyDelete