Showing posts with label crafts. Show all posts

Monday, October 22, 2012

Lisa: Eyeball Pie and Some Ghostly Friends!!

Hello!!  I am very excited about this time of year!  I love the fall and the beginning of the Holiday Season.  The cool weather, nice storms and the excitment for our traditions just makes it so enjoyable! 

I have a few traditions that my kids, my husband and I have formed over the years.  I tend to be the room mother of one of their classes so we have Halloween Parties at school that I am incharge of.  I try to have four stations that the kids rotate through: a craft, a food, and two game stations.  One of the crafts that we do that is very easy and popular (because it invovles candy!) is:

Tissue Paper Ghosts

These are super easy, especially for the younger children.  I think my sisters will remember these because we use to make them growing up!  They are simple but so fun for the kids to make and decorate the house with! 

Supplies:
Kleenex Tissues
Lollipops
Ribbon/Yarn
Sharpie/Marker

Directions:
Cover a lollipop with a tissue.  Tie around the top of the stick to keep the tissue in place.  Draw a face onto the tissue.  Easy.  You probably didn't even need instructions!
 
Another tradition that we do during the month of October is Halloween food.  We love to come up with scary/gross food to eat.  But not too scary or gross!!  I thought I'd share with you one of those recipes.  This one is called:

Eyeball Pie   


Ingredients:
1 medium potato, shredded and drained (or just squeeze out the juice)
4 strips of bacon, cooked and crumbled
1/4 c. cheddar cheese, shredded
1/4 c. butter, melted
salt and pepper to taste
4-8 eggs

Directions:
Take 4 mini pie tins and divide the shredded potato between them.   Press the potato up the sides and bottom of the tin.  Drizzle 1-2 teaspoons of butter over potatoes in each pie tin.  Sprinkle with salt and pepper.  Bake in 425 degree oven for 15-20 minutes, until potatoes begin to crisp.  Then, into the hashbrown crust, sprinkle bacon and cheese.  Over the top of the pie, add a cracked egg or two.  Salt and pepper the egg, to taste.  Finally, drizzle the remaining butter over the top of the eggs and put back into a 350 degree oven for 10-15 minutes.  It is really a nice breakfast treat.  My picky child even declared she wanted this every morning (but to be honest, she'd say that about anything with bacon!).

And finally, what is Halloween without decorations?  I love Halloween decor but not the scary stuff.  I prefer the cute!  One of the things I got last year were these

 Mummy Blocks


These are so cute and easy to make but they are one of my kids' favorite decorations!
 
Supplies:
Wood of any size
White craft paint
White fabric, torn into 1" wide strips
Googley eyes
Black craft paint
Sponge brush
Glue gun
 
Directions:
Take you wood pieces and paint white.  When paint is dry, wrap blocks with fabric, making sure to put a little bit of glue under the fabric each time your wrap it around the side of the block.  Next take your black paint and just dry brush the edges of the block and bandages, in the manner you see above.  Finally, glue on your googley eyes and there you go.  Simple and awesome!
 
Well, there are a few of our traditions for this time of year!  Hope you enjoy!
 
 
Lisa


Wednesday, September 26, 2012

Sara Jane: DIY Gifts

I am one of those annoying people who has 99% of their Christmassing (yes, that is a word in my home) done December 1st EVERY year.  I do if for two reasons: (1)  I LOVE the entire process of buying/making gifts and then giving them to others and (2) So I can really enjoy the entire month of December and focus on the family traditions that we have created within our own little family.

During the year, when I am out shopping, I am constantly thinking of who would like what.  Two years ago, I had my children's entire Christmas done in January (there was a fantastic sale I could not pass up).  This year, however, I have been slacking soooooo, I thought I would share with you some of the projects I have recently started working on for Christmas.  I love doing homemade gifts, especially for my children, so I can personalize the gift for the person who will be receiving.  Here are a few that I've started....

1.  Car Caddy
2.  Doll with carrying case
3.  Mini Coloring Tote
4.  Magnetic Scrabble Board
5.  Little man ties
6. Sticky Grams (such a cute idea for grandparents!)

I just finished one super simple gift this weekend and wanted to share it with you.

I went to our local Habitat for Humanity ReStore this weekend looking for materials that would inspire me to do something crafty.  This store is one of my favorites!  Not only do they serve a pretty incredible purpose but they have random parts and pieces that you can't find anywhere else.  We got our beautiful claw foot bathtub at our ReStore for a steal!

Anyway....while there, I discovered their tile section.  After holding a tile for probably 3 or 4 minutes, I remembered seeing a coaster somewhere that a person had made from a tile and some modge podge.  Perfect!  I grabbed a few tiles (only $0.10 each!) and headed home.

For this coaster project, you will need, tiles (however many you want to make), mod podge (mine is homemade - Just a 50/50 mixture of Elmer's glue and water), decorative paper, felt, a clear high-gloss spray paint (not pictured), and a hot glue gun.


First, cut your paper so that the paper squares are just slightly smaller than your tile.  Next, paint your tile with a thin layer of mod podge.  Place your decorative paper on top of the tile/mod podge.  Paint another layer of mod podge over the decorative paper.  Allow to completely dry (I had them dry over night) .  Finally, spray a coat of clear high-gloss spray paint on top.  To finish off the coaster, cut out felt squares to line the entire bottom of the tile (I simply traced the tile onto the felt) and glue them on with the hot glue gun.  So simple and they turned out really cute.


There are so many ways that you could personalize these coasters.  I will be making some for a certain family member that will have pictures on top of the decorative paper.  Another fun thing you could do is to first paint the tile and then add paper/pictures.  Or, how about adding stickers to say something fun.  The possibilities really are endless.

Until next week...

Sara Jane

Wednesday, September 12, 2012

Sara Jane: Pumpkins!

Hi friends!

From now until January, be prepared for way too much excitement in my posts.  Like I told you last Wednesday, I LOVE everything about September, October, November, and December.  I love all the food, the decorations and the overall excited/giving spirit that most people seem to have.  

I'm not sure if it is the changing of the seasons or what but I have had way too much happiness in me the last few weeks.  Its the kind of happiness that all you want to do is turn the music up way too loud to sing and dance.  Yesterday, I tried to channel that happiness into something productive for the blog.  

We have had this huge pile of wood sitting outside of our house since July.  A lot of it is wood we picked up from my in-law's house, the pallets were delivered to our house by a friendly neighbor, and then there are just lots of scraps of wood from some remodeling we've been working on.  Hmmmm, what could I do with all this wood???  PUMPKINS!


This project was so easy.  I went through our huge pile of wood...


and found a few random pieces that I thought would make cute pumpkins.  I also I had my sweet hubby cut a few little pieces for the stems. 


Then came the painting.  I had a few little helpers for this part.  For their pumpkins, they painted then entirely orange.  For my pumpkins, I did the first coat white.  When that coat was dry, I painted an orange coat on top of the white.  For the stem pieces, I simply painted them green.

When everything was nice and dry, I distressed the wood with a piece of sand paper.  If you don't like that look then just omit this step.  Next, using my glue gun, I glued a piece of thin wire, which I curled, and the green "stem" to the top of the pumpkin.  I think they turned out pretty cute.  When I finally dig my harvest decorations out of the attic, I will decorate with leaves but for now, these will simply sit on my mantle as they are.  They brighten up my living room....I LOVE them!


I never feel like my posts are complete until I share with you a favorite recipe.  Today, I thought I would share with you a recipe my sister-in-law, Micky, gave me.  Gingersnap Pumpkin Pudding.  I have seen several recipes similar to this one but I have not liked any of them as much as I do this recipe.  It is always a hit when I have it at parties.  I use it mainly as a dip for gingersnaps or fruit although I am positive you could eat it by itself.  It is absolutely delicious.  We have it several times during the fall.  If you love all things pumpkin, you must try this gingersnap pumpkin pudding!


GINGERSNAP PUMPKIN PUDDING

Ingredients:
* 1 3/4 cup cold milk
* 1 package instant cheesecake or vanilla pudding mix (the small box)
* 1/2 cup canned pumpkin
* 1/4 to 1/2 teaspoon pumpkin pie spice
* 3 gingersnaps, crushed
* 1 cup whipped topping

Directions;

In a large bowl, whisk milk and pudding mix together for 2 minutes.  (I use my electric mixer for this part).  Stir in the canned pumpkin and the pumpkin pie spice.  Let stand for a few minutes or until soft-set.  Fold whipped topping into pudding.  Sprinkle the crushed gingersnaps on the top. 

There you have it folks.  Have a great rest of your week!

Sara Jane

Monday, July 30, 2012

Lisa: Olympic Medals


Olympic Medals

Hello, hello!!  What a fun week with the Olympics coming up!  We are very excited here to see, hear and read about our favorite events!  One of the things that I did for my kids was to make them Olympic medals.  They are super easy and a fun way for kids to participate and feel part of the Olympic Games!

Supplies:
Licorice Ropes (I couldn't find them so I used individually wrapped licorice taped together)
Chocolate Coins
Glue or Tape

Directions:
Tape or glue the ends of the licorice rope together and glue or tape on the chocolate coin.  Easy and fun. 

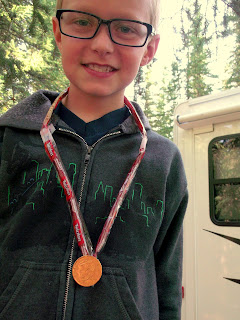
My kids each declared that they were the gold medal winner and posed for some fun photos!

Hope you are enjoying the Olympics and GO USA!!!

Lisa

Monday, July 23, 2012

Lisa: Inspiration Boards

Hello!!  Welcome to another crafting week at fivecraftysisters!  What I wanted to share with you this week is something I did for my children last Christmas.  I got the idea from a Pottery Barn Teen catalog but I adapted it just a little.  Here is the original:

Inspirational Quotes Wall Art
It looks pretty cool and like some art that all my kids would like in their rooms.  I wanted to change some of the messages, though, so I thought maybe I should make my own!  I bought used magazines from my library for 5 cents and used some magazines of my own.  Over a few months, I cut out quotes and ideas and phases that I thought described my children or things I wanted them to aspire to or just something to remember!  It was quite inspirational for me as I thought about each of my children and what kind of people they are and what they can become!!  I then took an artist's canvas from Hobby Lobby and painted it a color they like and Modge Podged all the cut outs on.  And here is what they got:
It isn't as chaotically organized as Pottery Barn's art was but I like the personal touch.  I want it to eventually hang over their desk in their bedrooms so that they can remember how amazing they all are.


And they all loved it.  Even my teenage boy whose goal in life is to make a face in every picture I take!!  But I wouldn't have it any other way! 

I love you, my little monkeys!!

Lisa


Friday, June 29, 2012

Friday Favorites: Pinterest Projects and Ideas

Hello, hello!  This is Allison.  "Wait a second," you're probably thinking, "your day is Tuesday, silly!"  True.  But we're doing a little rearranging here on Five Crafty Sisters.  Life has gotten a little crazy for Katrina, so she's decided to be more of a guest blogger than a regular, here on the blog.  With two little ones at home and a third on the way, who can blame her?  So we'll be playing around with Fridays for a bit, while Shauna moves her posts to Thursdays.

As our Etsy shop has now opened (http://www.etsy.com/shop/fivecraftysisters, in case you were wondering), we may occasionally do a "Friday's Market" to introduce new items in the shop.  Other Fridays may be posts from Katrina, or maybe our other sister-in-law or sister will want to add their craftiness.  We'll see if we can recruit them.  :)  But for today, we're going to play around with "Friday Favorites".  Today we will each share our favorite Pinterest/Internet finds.  They may be projects we've completed, or maybe a project inspired by something we saw online.  We may also decide to share a project that we're currently working on.  It's up to each crafty sister to decide.

I'll go first.  This is kind of cheating, right off the bat.  I guess I'm the rebel in the family.  :)  This is actually a project my husband, Brent, completed.  But I found a pin on Pinterest that will hopefully solve a problem I've been worried about.  My husband started wood working this year and has really enjoyed working with his hands.  He made this amazing bench for our kitchen table and started working on a toddler bed after we found out I was pregnant with baby #2.  I love this little bed!  He has really enjoyed Ana White's website found here which provides the plans and the supply lists for countless projects.  I've seen a ton of her stuff on Pinterest, and think she's my new hero.  Anyway...  I love this bed, and Isla does too.  Way to go, Brent!  Isn't my husband the best??  :)  (Did you notice the adorable quilt my mother-in-law, Linda, made?  Love it!)

So one of my fears with this bed, was that we wouldn't be able to easily add a guard rail for Isla to use until she got used to sleeping in a real bed.  I could just imagine all the drama of her falling out of bed in the middle of the night.  But then, I found this amazing idea on Pinterest: put a swimming noodle under the fitted sheet on the edge of the mattress.  It will serve as a bumper if your toddler gets too close to falling off.  SO SMART!  It was a total aha moment when I saw this pin.  I haven't tried it yet (as we're leaving Isla in her crib as long as she'll let us), but I definitely plan on seeing if it works.  Pinterest hasn't failed me yet, so I'm sure it will solve all of my worries.  :)  Okay... which of my amazing sisters is next?

Allison
http://pinterest.com/allisonlacey/
 .................................................................................
 Hello there! This is Shauna.  I know you all have missed me since yesterday.  Today I want to get serious, and talk about something personal.  I have a problem.  My friends and family all know about it, and now I think it's time I share with you...I really like cats.  A lot.  I'm about five cat calenders away from being a crazy cat lady.  It's pretty scary.  Lisa's youngest, after forgetting my name, once referred to me as "the aunt who likes cat".  Well now that you know, I can be open about my cat crafting. Get ready for this. 

A few months ago I realized we really needed new pot holders.  We were barely surviving off our old tattered wedding gift pot holders, and I wanted a cheap way to vamp up the look of our kitchen.  Then I saw these pot holders off of  www.purlbee.com  and I fell in love. 


I loved how modern and unique looking they were.  So I decided to pull out some fabric my friend Bethany gave me and put my own twist on it.  I am kind of obsessed with them. 


I used the cat fabric on one side and gray neutral on the back.  I like to mix it up sometimes when I get sick of the cats.  One of these I really messed up on...I added the hoop onto the bottom instead of the top of the pot holder so the cats are upside down when I hang them up. 


I decided instead of sewing only a couple lines to hold together the batting on the pot holders, I decided to sew random lines all over the pot holders to give it some style. I hope you enjoy cat pot holders.

Shauna

....................................................................................................................................................................
Hello there!  Lisa here.  Just for the record, Shauna is a cute kind of cat lady not a crazy kind of cat lady!!  And Allie, that is a fantastic idea for a bed.  I was always worried about my babies falling in that crack between the mattress and the wall!  Smart!

For my project idea, I thought I would show you something I made awhile ago to hold my calendar and little notes and pictures for and from my sweet children. 

Calendar and little heart man is courtesy of my baby.  He's such a little sweetheart!

I thought I came up with this idea but once I joined Pinterest, I realized that there are very few original ideas, including mine!!  I had a large picture frame that I took the glass out of and painted to match the trim in my house.  I then took some cork tiles I found at Hobby Lobby and glued them to the back of the picture frame.  Super easy and a nice way to not feel bad about throwing out something perfectly useable!  And, bonus, it keeps the front of my fidge a little cleaner!!  Winner!

Lisa

***************************************************************************************************************************************

(Sara posted what I'm sure was a great post, but for some reason, it didn't save.  Look for it next week!)

Monday, June 25, 2012

Lisa: Fourth of July Celebrations!

Hello all and welcome to a new week!!  We are working on all things having to do with The Fourth of July this week.  For our Fourth of July celebrations, we invite all my husband's family over for water fun, a BBQ and fireworks.  We have a very large grassy area that works for accommadating large number so it is perfect.  I have table decorations planned but I thought this year would be fun to spruce up our yard with decorations!  So for this week, I am doing star decorations for the flower beds. 

These are super easy and take a very short amount of time to make. 


Supplies:
Wooden stars
Patterned paper
Wooden dowels
Mod Podge
Sponge brush
Paint
Wood glue

Steps:
1) Lay out the stars and paint the desired color.  Let dry.
2) Trace star shape onto the back side of the paper.  Cut out.
3) Paint a layer of Mod Podge onto the dried, painted star.  Place the cutout star shape on the painted star and smooth out any wrinkles that appear.  Allow to dry.  Paint a top layer of Mod Podge onto the paper.  Let dry.
4) Drill hole into bottom of the star that is wide enough for the dowel to fit.  Cut dowel to desired length.  Place a small amount of wood glue into the drilled hole.  Insert dowel and allow to dry. (Or you can do what I did and skip this step altogether and just tape the dowels on!! I ran out of time!)


Done.  I think this will add a little fun to our outdoor party without me (I mean my husband) having to get up in the tree and string decorations.  Very nice!

Lisa