Showing posts with label sewing. Show all posts

Thursday, December 6, 2012

Allison: Christmas Projects and Ornament Books

Hello again!  I've meant to post various times the last couple of weeks, but it just hasn't happened.  But I have a few posts planned for the next week.

Christmas projects are in full swing here at my house, so I thought I'd share what I've been working on.  Since we've been married, I've wanted to make our own family stockings.  So this year, I finally started!  I've completed Brent's stocking and my stocking so far.  Two more to go!  Here they are:

Brent's stocking (left).  Allison's stocking (right).

Each ended up being such a quick project and so fun to make.  I'm excited to see all 4 hanging above the fireplace.

I've also completed an ABC book that I gifted to my sister, Sara.  We grew up with a similar book from my Grandma Golda, and Sara and I have talked for years about creating some new ones to give to our siblings.  I'm planning a post in the next week or two to share the great text with all of you so that you can make your own.  Start collecting Christmas cards!  Here are a few pages:


I've also been working on our immediate family's presents.  Both my family and Brent's exchange presents with one other sibling's family each Christmas.  I decided to add a little more stress to my life by making them myself.  I've wanted to make some kind of quilted project for my sister-in-law, Tammy (Brent's sister), so I made her and her family a Christmas tree skirt.  It turned out so cute and I hope their family enjoys it.


I'm currently working on a gift for the family of my brother, Briant, but I'm not ready for pictures yet.  And of course these cuties have kept me mildly busy.


See why I haven't posted lately?!  But the project I wanted to share this week, are these family ornament books.


Does your family buy special ornaments each year?  Or maybe you have ornaments that have been handed down.  I saw the idea on Pinterest to create a book with pictures of each special ornament and the story behind it.  That way, years from now, the story of each ornament can be passed down.

Making these cute books was super cheap and easy.  I found these little photo books for a dollar at Joanns, allowing me to change out the cover pages.  Then I simply scrapbooked a small page with the title of the book.  Easy!

Next, I took pictures of each special ornament, and through Powerpoint inserted the year and wrote out a simple description of the ornament and its significant.


I also think I might include a "family picture" of Christmas morning each year.  I'm excited for the day that my kids will look through their books each Christmas, as they hang their special ornaments on the tree.

I hope you're all enjoying your Christmas projects, and not stressing out too much.  Don't forget to remember the reason for the season.  Have a great week!


Allison

Friday, July 20, 2012

Friday Favorites: Allison's Favorite Blog

Welcome to another Friday Favorites!  This week you just get to hear from me, since I'm the only one without a life.  Waiting for this baby has given me a lot of extra time.  :)  I thought I'd share with all of you one of my favorite blogs and why I think it's so great.

Before I finally gave in to Pinterest, I used to have a handful of blogs that I really enjoyed checking in with on a weekly basis.  Some of my favorites, were quilting blogs.  I loved to look at all the finished products and to find inspiration in their designs.  I especially loved when they would give the patterns so that I could make the same quilt.  That's one of the reasons I love The Moda Bake Shop.  At www.modabakeshop.com, they give you step-by-step directions to create the most beautiful quilts and sewing projects.  Since it is a blog for Moda Fabrics, they even give you the fabric line used.  That's especially helpful if you want to make THE EXACT same quilt.  I actually really enjoy making up my own patterns for quilts, but I'm not the greatest at measurements.  So this blog is very helpful.  :)

I also appreciate how easy it is to navigate through this blog.  You can search the "recipes" to find only baby quilts or search by certain fabric lines.  You can even search through the "chefs" if there is one quilter in particular that you'd like to follow.  I would definitely recommend checking out this blog.  Just look at the cute projects I've been able to complete with their help:


This is a Christmas tree skirt I made for my sister, Shauna.  The pattern was so easy to follow with The Moda Bake Shop's directions and measurements.  I LOVE how it turned out.  If only I could find the desire to make my own now.  :)

Bad pictures, but I think the cuteness still comes out.  :)

This is a baby quilt I made for Sara's little "B".  Looks like I need to make something for Lisa, huh?  :) This was my first experience making pinwheels, and the "recipe" I used from the Bake Shop made it so much easier.  I also loved learning how to make the prairie points and have since used them for other projects.  Do you see yet why you need to visit this blog?  They also have many other projects besides quilts.  I hope you take a second to check it out!  Have a great weekend!


Allison


*****************************************************************************************************************

Tuesday, June 12, 2012

Allison: Car Seat Cooler Tutorial

Hello again!  I love reading about all the fun stuff that Lisa does with her cute family!  It makes me really excited for my little family to do similar things in the future.  That being said, with a twenty-month-old, we don't really go on many outings.  If Costco counts as an outing, then we go on A LOT!

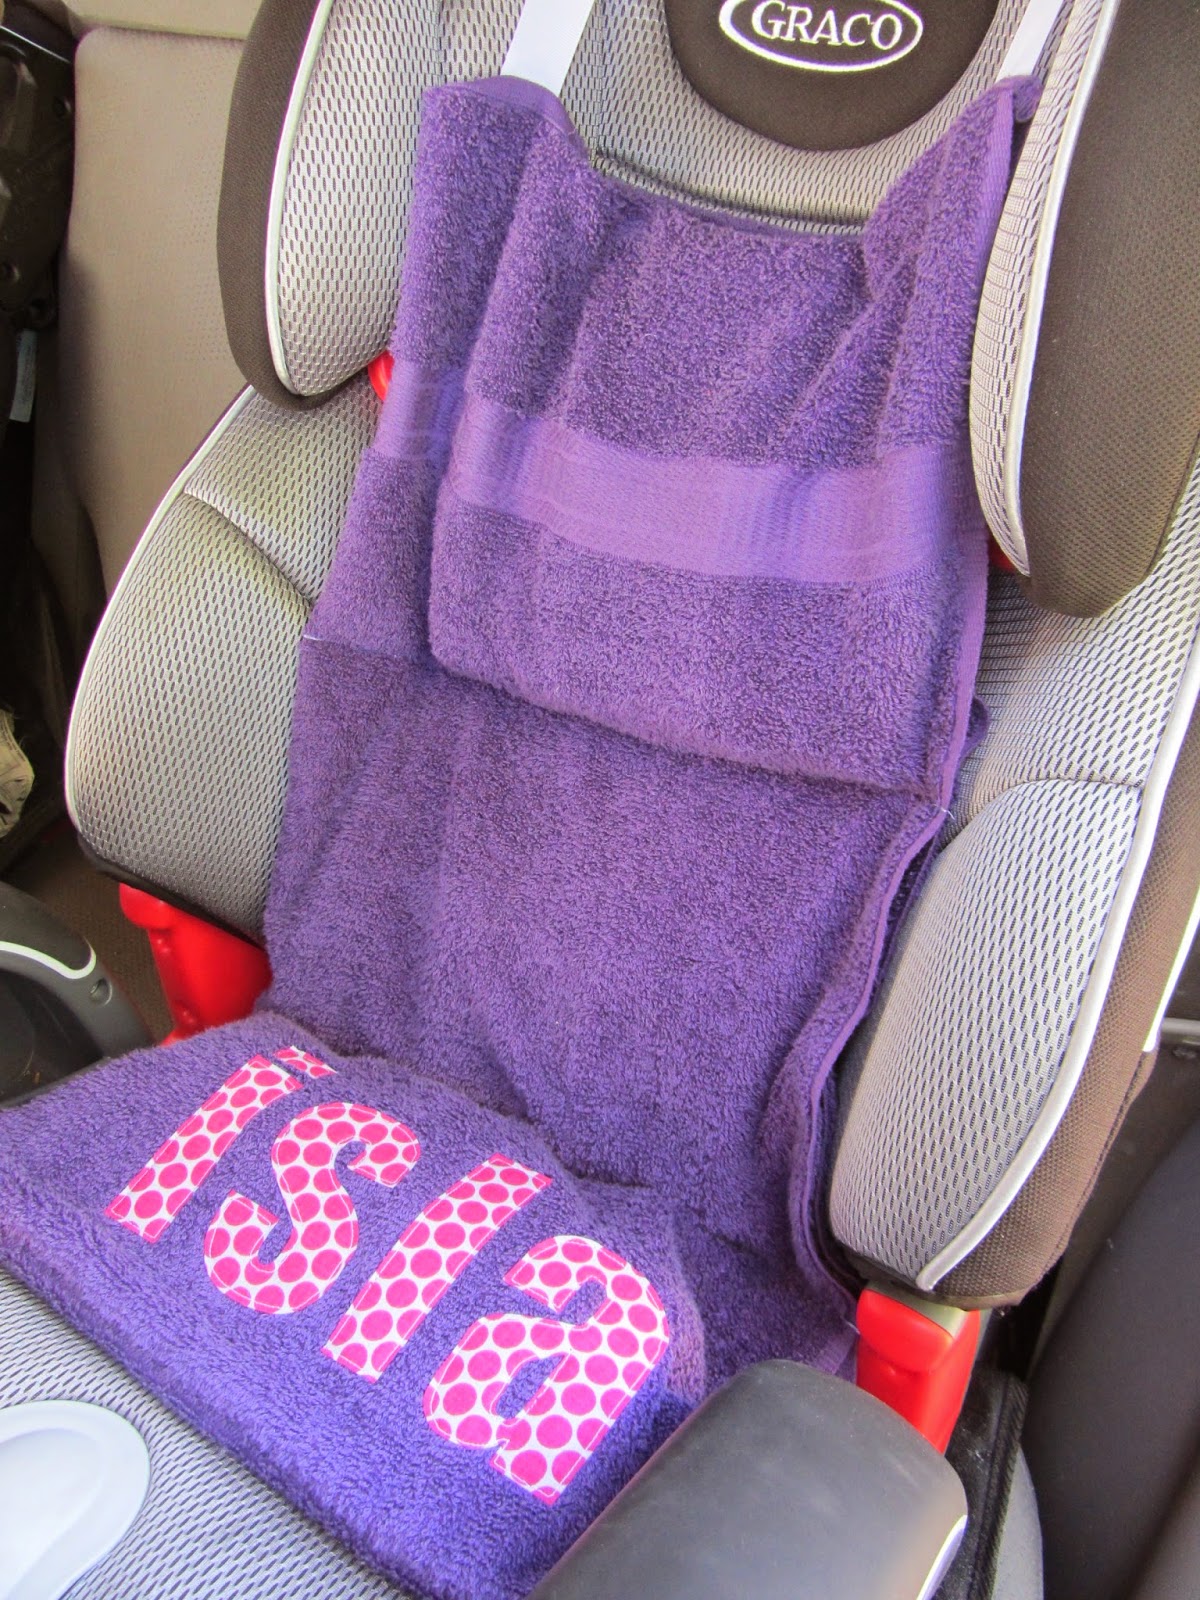
Isla and I spend our days doing pretty basic things: cleaning, shopping, watching Toy Story 3.  That's about it.  But anytime we do venture out of the house, I face the same dilemma:  Arizona heat and a hot car seat.  Luckily, Isla doesn't really seem to mind the heat as much as her pregnant momma does.  Lately I've really wanted to fix the hot car seat problem, but have been pretty lazy about making her one of the really cutesy car seat coolers I've seen on Pinterest.  So I decided to embrace the laziness and make the most basic one I could that would still get the job done.  It took me a total of about 10 minutes and will give her all the relief of an overly-embellished version.

Before I describe the process, I should probably explain a car seat cooler, if you haven't already figured out its purpose.  When you leave the house, you grab the cooler and take it with you.  Once your little one is out of the car seat, you place the cooler in the car seat, tucking the straps with those hot little metal buckles underneath the cooler, and go about your planned activity.  Once you return to the car, you remove the car seat cooler and place your child in the nicely cooled seat.  Genius!  Okay, here's what you'll need to make your own:


The towel I bought was $3 at Walmart.  Can't beat that!  I would have preferred to use smaller packs, but these will still work.  I pictured the colorful little coolers because I thought they were so stinking cute.  Isla was a big fan of them too.  :)  These could also be used in a smaller version.  Here are the four easy steps to make your cooler:


#1- Fold your towel hot-dog style (or the long way), and then cut in half.  Technically this one towel can make two coolers.  Maybe one for mom's seat too.  :)  Next sew the top closed after inserting a ribbon or some kind of strap that will be used to hang the cooler from the headrest.

#2- Sew the opposite end closed.

#3- Measure the length of the towel, and divide by three (or however many packs you plan to use.  Smaller packs may need more "pockets".).  I used a disappearing ink pen for marking.

#4- Sew straight lines the width of the towel to create your pockets and insert your packs.  If you'd like to sew a little strip of Velcro to keep the pockets closed, you may want to do that before you sew the lines across.  I figured it would be hanging and the packs would stay put, so I didn't add any.  And... I'm lazy.

That's it!  Isn't that easy?  I realize it's not the prettiest thing I've ever made, but it'll do.  I've read on different sites that the packs can stay cool for up to 6 hours.  I have also seen others use the gel packs.  I don't want to deal with possible leakage, so I think I'll stick to the plastic packs instead of the gel.

I realize that most of you probably aren't experiencing the kind of heat we are here, but hopefully this tutorial may still be useful in some way.  I know that my little Isla will enjoy the fruits of my lazy labor.  :)  I hope you're all enjoying your outdoor outings and these Summer months!  Have a great week!!

(Don't want to make your own?  I'm now selling them in my Etsy shop.)


****UPDATE- 5/30/14****

It's been almost two years since I wrote this tutorial.  It has had almost 3000 views, and I have heard some feedback from those that have used it.  I have made only slight changes to the coolers I make now (like hiding the seams), and have enjoyed adding a personalized element.  Here's the new cooler I made for my now almost four-year-old:


I've also enjoyed playing around with color combinations with custom orders in my Etsy shop.


Thanks for letting me share!!  :)


Allison


Sunday, May 20, 2012

Lisa: Summer Activity Board and Cool Summer Sleeping Bag!!

Summer Kick Off!!!

This week our theme is a great way for me to start thinking about all the upcoming summer and the fun that it can be!!  One thing my husband and I have found to help motivate our children and to help organize our summer is a Summer Activity Board!  We let the kids think of activities and places they'd like to go near our home that are reasonable (we did have to nix the deep sea diving off their list!).  We then have them write their ideas on a poster board and keep it up where we can all see it.  Throughout the summer, we make plans to do an activity whenever we can and whenever chores are done.  It helps to make sure our summer doesn't pass us by without us getting anything done!


One of the children didn't get the idea that this was summer activities!  The ice fishing might have to wait till next winter!!


So my craft for this week is for a summer style sleeping bag made out of one twin sheet and a pillowcase.  With our summer comes a lot of family camping trips, sleepovers, summer camps, and sleeping out under the stars. All of which need a sleeping bag.  We have sleeping bags for each of the children but sometimes it is just too hot to sleep in them!  I have an old flat sheet that lost it's matching fitted sheet so I thought, why not?  A sleeping bag made out of a sheet would be so much better!  It is really a simple project and very good way to use your old bedding!  I was slightly embarrassed at how plain my sheet was so I went to Walmart and got a twin flat sheet for only $5!  Not bad! 


 I also purchased a matching pillowcase at 2 for $5. 

Materials:
1 pillowcase
1 twin sheet (for children or larger for taller people!)

Steps:
1) Fold sheet in half lengthwise with the inside out and cut to desired width.  Hem raw edge.
2) Sew up the newly hemmed edge and one of the ends.
3) Attach pillow case to the center of the unsewn end. 
4) Turn right side out and you're done!

I did go a step further, though, and changed the opening of my pillowcase so that I can just fold up the sleeping bag and keep it in the pillowcase when not in use.  To do this, I opened the seam on one side of the pillowcase.  Then I hemmed that newly exposed edge.  Next I cut off the cuff of the pillowcase and sewed that end shut.  Finally, I just attach the pillowcase to the sheet (like in step 4 above).    


Very simple and easy to put together but I think it will be really useful!  It would also make a great sleeping bag liner!  Here it is all folded up.


Kind of cute, isn't it?!I thought about putting straps on it so it could double as an overnight bag but I don't like the idea of long cords near my baby's neck at night!!  Call me crazy!  And of course, my other sweet children wanted what their sister got so I used what I had on hand to make them something.  First up, the cute IKEA fleece throw turned summer sleeping bag for my perpetually cold baby.

Super cute and perfect for her little self!!  Then of course, for daddy's little boy:


Go Cougars!  This is just made from two fleece panels that fabric stores sell.  We've had these floating around the house for awhile now.  Finally they have a purpose!


 Perfect!!  How are you and yours kicking off summer? 
Lisa


Monday, May 7, 2012

Lisa: Teacher Appreciation Week Book Bags!

Hello, everyone!  Welcome to a new week! I am impressed with the many thoughts, ideas and Mother's Day gifts that you've all posted last week.  Fantastic!  Mom's going to love them!  You know, mom use to call me "Mama Lisa" because I took care of all of you just like I was your mom.  Just saying, you know, in case you'd like to show your appreciation.  Ahem....

Anyway, now that we've shared our thoughts on all the moms in our lives, let's talk about the person that we've all accidently called "mom" at one point or another: our teacher!  As a child, I loved school!  I looked forward to it and thought summer was way too long!  My teachers were a big part of that love of learning!  I can name almost every teacher I've had from preschool (mom!) through high school.  They not only helped me to learn what I needed to prepare me for life, but they also set me on my path by opening new possiblities!  Now that I'm a mom myself, I have a new respect for their hard work and the attention they give to my children!  So, in their honor, this week our theme is "Teacher's Appreciation Week"!


My craft for this week is a little book bag that I can't take any credit for becasue my dear sister-in-law, Heather from Quilt Story, taught me how to do it and even supplied some beautiful fabric for it!!  Thanks, Heather!  Anyways, the bag is really not too difficult.  I wanted something that the kids could help out with (mostly).  I've included lots of pictures to help along the way!

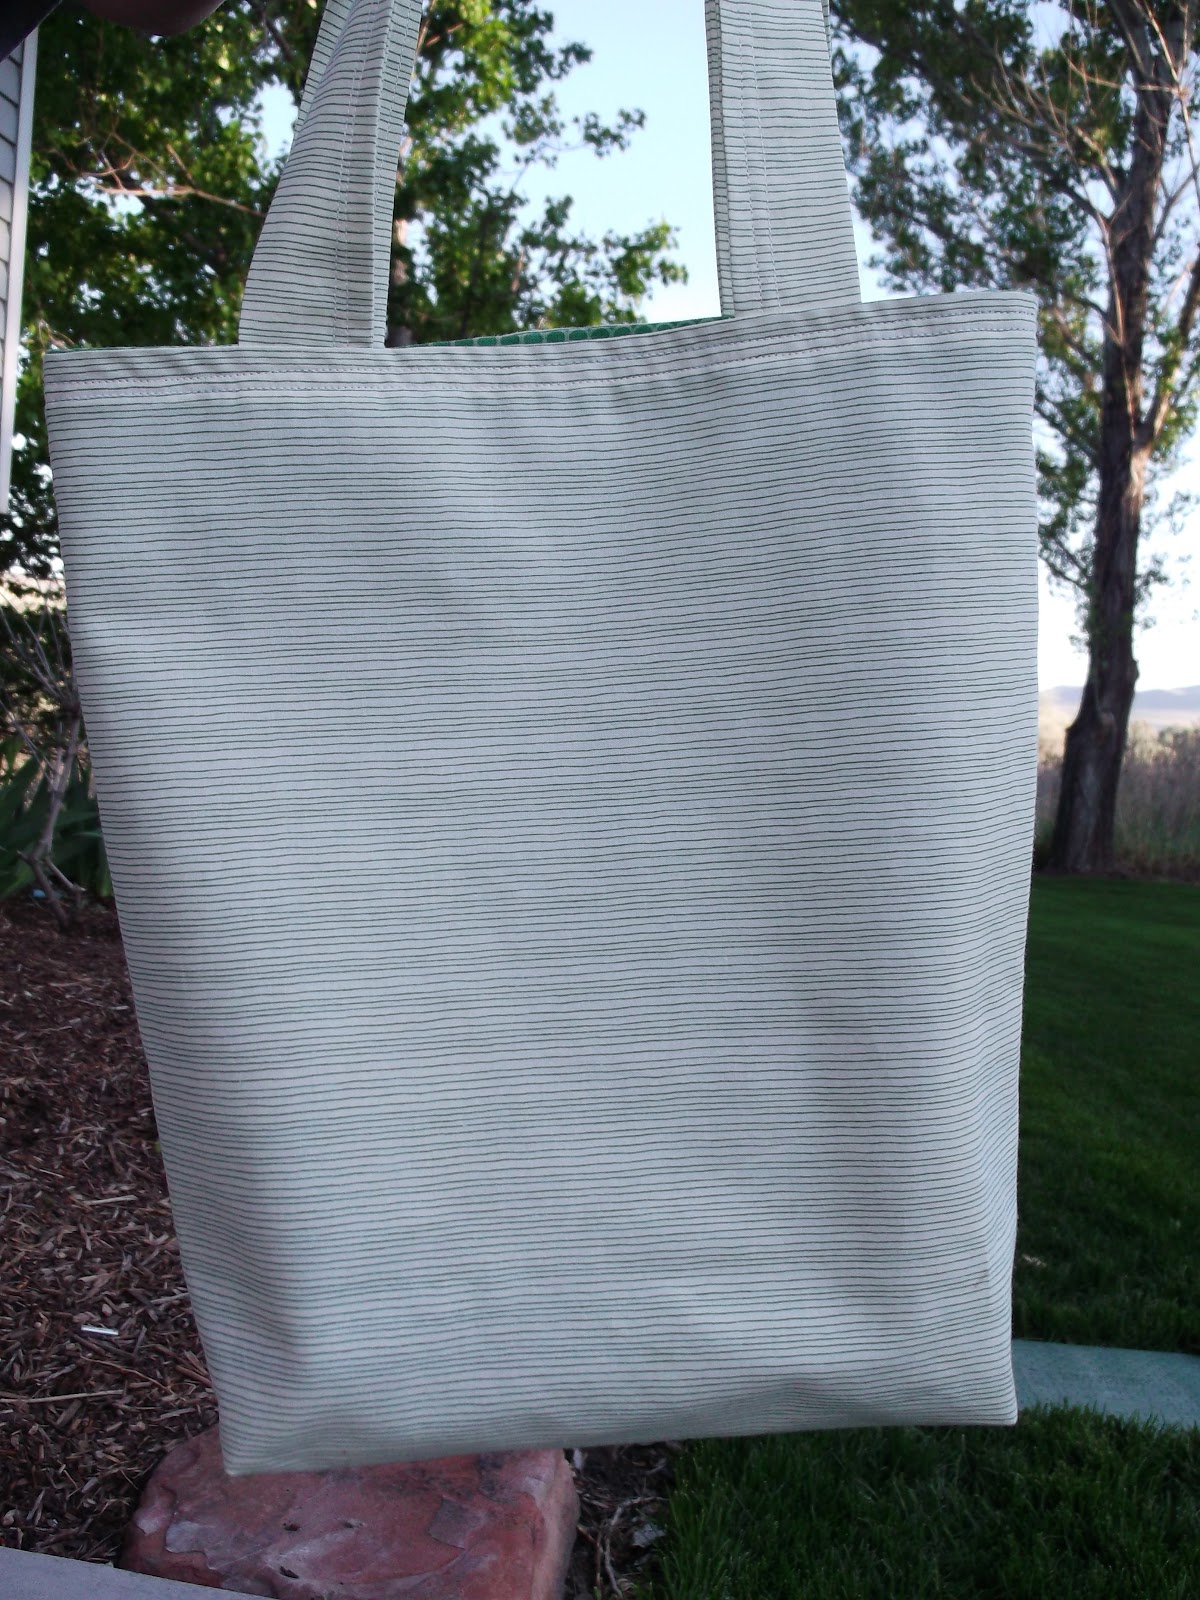
First step is pick the fabric. I went with green because I wasn't sure if my son's teacher would like some of the brighter, louder prints and colors!  You'll need a fabric for the outside (we'll call this fabric A) and another for the inside (fabric B) plus more for the straps.  You can make your bags any size you'd like but here are the dimensions I used, if you'd like them:

Body: 15" width x 34" length (Use this measurement only if your fabric has no up or down directional pattern like my green stripe on the left.  If it is a directional print then just cut 2-17" lengths using the same width as before).  You'll need one cut out of fabric A & fabric B.  A half of a yard of each was plenty for my bag.

Straps: 2-3.5" width x 26" length (I used the fabric A for the straps) 

The next step is to straight stitch up the sides and the botttom of both of the body pieces leaving the top unstitched on both.  I had my son help with this step.  You might be able to see the blue painter's tape I put on my machine to mark the 1/2" hem.  It was an idea I got from my mother-in-law and really seems to help.  My kids, that is.  Oh all right.  It helps me, too!
Now that the body for both fabric A&B are sewn, we are going to make a square bottom for our bags.  Start with one of fabric A's bottom corners.  Take the bottom fold and line it up with the side seam next to it.  Pin it in place.  Measure 1.5" (or whatever width you'd like the bottom of the bag to be) in from the corner and mark with a pencil.  Next sew a straight stitch along the line you just marked and then cut off the corner. 
Now for the straps.  Take the fabric you previously cut and fold it in half length wise so that your fabric is inside out.  Straight stitch a seam along the length of the strap.  Turn the strap right side out.  I used another handy tip from my mother-in-law and attached a safety pin to one end of the fabric.  I then sent the pin through the strap and bunched the fabric up as I went along.  I then pulled the fabric through.  Nice and easy!  To finish off the straps, iron it and run another straight stitch up along the length of the fabric again.

On to the assembly of the bag.  Take fabric A and turn it right side out.  Take fabric B and turn it inside out.  Now take fabric A and put it inside fabric B, making sure that the seams line up with each other.  At this point, the right sides of the fabric should be facing each other and the lining should be on the outside.  Next come those pesky straps!  Take on strap and sandwich it between the two layer making sure the end of the straps are sticking out the top of the bag.  Now measure 2.5" (or whatever you'd like just so long as you are consistent so that the straps of the bag will line up with each other) from the side seam and pin the end of the strap to both the fabrics.  Repeat with the rest of the straps and ends.  It should look like the picture above at this point.  Next, sew a straight stitch around the top of the bag but make sure to leave about a 4" hole so that you can turn the bag right side out.   


With the bag right side out, you are almost done!  Just iron the bag and run another straight stitch around the top to lock the seam in place and to close the hole we left.  And now you're finished!!  See, not so hard, right?!


Finished!  I couldn't resist adding an applique of my son's drawing to the bag.  It was quite easy and ended up very cute, if I do say so myself!


Here is the little book worm book bag my daughter is giving to her teacher, as well!  They are very sweet little projects.  Mmm...I might need to make myself one of these babies!

Well, on to you, Allison!  I can't wait to see all the wonderful things you guys post!  Love you!

Lisa


Friday, May 4, 2012

Shauna: The Garden Apron


I love all the post from my sisters! They are such wonderful mothers.  I've been so blessed to have not only a wonderful mother, but a loving mother-in-law.  Both of these woman have been such a blessing to me as a young mother, and incredible grandmothers to our boys.  I could not ask for better examples of faith, strength, patience, kindness and love.  I love these woman so much!! It just happens that both of these woman like gardening, so I decided to make them garden aprons, and this is how I did it.


The Garden Apron Tutorial...