Thursday, July 11, 2013

Allison: Pancakes and Batter

Hello again!  How was everyone's holiday?  We spent ours in Utah at my husband's extended family reunion.  It was fun to see everyone and have some time away in a cooler climate (100 degrees in Utah was still cooler than AZ).  The 12 hour car ride with an active ten-month-old, and impatient two-year-old was interesting, but we survived!  At least we know what to expect when we do it all again next month for MY family reunion... in Utah.  :)


Here's the dilemma I face at least 3 mornings a week.  I go to make breakfast for my picky two-year-old, and she requests pancakes.  Hmm... most people have Bisquick in the pantry.  For some reason, I never do.  I think it has something to do with the fact that I can never find it at the store.  Lazy... do we need to discuss this personality trait of mine again??  Back to the story.  I never have it, and my daughter LOVES pancakes.  She likes about 3 breakfast foods, and 2 of them involve a sugary liquid topping.  I've made pancake mix from scratch, but it always takes longer then I'd like to spend mixing/concocting, while my brain is still waking up.

So the other morning, I decided to make pancakes.  I used the recipe that Shauna had posted here.  These pancakes are so good!  Perfectly fluffy and moist.  After making about 6 pancakes, I realized I had a ton of batter left, a two-year-old that had lost interest in her breakfast, and no desire to make any more.  At about this point, I remembered a pin on Pinterest.  So I grabbed a Winton frosting bag (found at any store with a cake/cookie decorating section.  I've also bought them at Wal Mart), and these handy-dandy bag clips (Ikea- love them!), filled it up, and stuck it in the freezer.  That was about a week ago.

Horrible picture, but a GREAT idea!
So last night, I thought that maybe I'd try making pancakes the next morning.  So I took the bag out, placed it in the fridge, and asked my good husband if he'd take it out when he got up with the kids.  To make a short story unnecessarily longer; it worked!  That one frosting bag made about 5 medium pancakes and one happy little girl.  And the best part: throwing away the bag after it was empty, with way less dishes to wash.  I plan to always have some batter in the freezer from now on.

Back to how amazing these pancakes are... They're so good!  My only irritation with the recipe, is that it calls for buttermilk, which I never have in my fridge.  But after I found this recipe for buttermilk substitute, I may never buy it again.  Here it is:

Add 1 T. lemon juice or vinegar to a 1 cup measuring cup.  Fill to cup line with milk.  Let stand for 5 minutes.  Done.

This recipe calls for two cups of buttermilk, so I just added 2 tablespoons of lemon juice (out of vinegar) to a 2 cup measuring cup, and filled the rest with milk.  I'm sure buttermilk tastes better, but this worked great for me.

My patriotic cuties.

I have lots of projects to share, so I'll be back again soon.  Hope everyone has a great week!


Allison


Friday, June 21, 2013

Allison: Baked Taquitos

Hello, all!  I've been trying to get a post up all week, but it just hasn't happened.  So now I'm squeezing one in Friday night.  This one is kind of a cheater post, but I HAVE to share this recipe.


As I've stated in past posts, I've kind of been the baby shower queen the last few months.  I'm still planning on sharing more details from each of those get togethers, but couldn't wait any longer to pass this beauty along: Baked Chicken Taquitos from the ladies over at Our Best Bites.  I was fortunate enough to attend Time Out For Women this last year, here in Phoenix, and heard Sara and Kate speak.  Not only are they crazy talented in the kitchen, but these ladies are fun-ny!  I know a lot of people have been enjoying their recipes for years, but I'm a little late to the party.

Back to the taquitos...   The third shower I threw was for my friend, Jenn.  After pinning down a theme, I needed to narrow down the food.  I was secretly hoping that Jenn wanted Mexican, as I'd found a few recipes that I was excited about.  When she did indeed mention "Mexican" as an option, I was thrilled!  I had found this recipe for taquitos on Pinterest, linking me to the Our Best Bites' site.  I tested them early, and immediately knew they'd always be on my go-to list.  Here's my favorite part:  they freeze well!!  You can jump on over to their site to get all the details, but I'll list them here also, with a few of my modifications:

Baked Chicken Taquitos

1/3 cup (3 oz) cream cheese (room temperature is easiest to work with)
1/4 cup green salsa (I used a 4 oz. can of green chiles)
1 T fresh lime juice (mine wasn't fresh...)
1/2 t cumin
1 t chili powder
1/2 t onion powder
1/4 t granulated garlic or garlic powder
3 T chopped cilantro (I was out of cilantro and green onions one of the times and I made these and they turned out okay.  But of course they give them a little something "extra".)
2 T sliced green onions
2 cups shredded cooked chicken
1 cup grated pepper jack cheese (I used whatever was in the fridge, and they were still amazing!)
corn or flour tortillas (I used the small fajita flour tortillas, and it made around 12-15 taquitos)
kosher salt

Here are some quick instructions:

*Pre-heat the oven to 425 degrees.
*I mixed the cream cheese, green chiles, lime juice, and all the spices together, then added the chicken and cheese.
*If you microwave the tortillas for a little bit, they're easier to work with.
*Spread a spoonful of the mixture on the first third of the tortilla, then roll it tightly up, placing the taquito fold down on a plate.

These girls are my heros... I love that they include directions to freeze the taquitos for later use:

*Place rolled taquitos (on a plate or pan) in the freezer until they're firm/frozen, then transfer them to a freezer bag and save until the craving hits, late at night.  :)

When it's time to cook/devour:

*Place taquitos on a tinfoil-covered pan.  Brush with olive oil, or spray lightly with cooking spray.  (I tried both of these methods, and I couldn't tell a difference.)  Sprinkle with kosher salt.
*Baking time with vary, depending if they were fresh or frozen.  I found 12 minutes to be a good jumping off point.  Then I would just check on them until the ends had started to brown.


**I did try these with a beef mixture too.  I mixed a pound of ground beef with taco seasoning then added refried beans, and salsa to the desired consistency.  I LOVE how they turned out, but I think I still prefer the chicken.


I PROMISE that these are amazing!  The crunch is very satisfying,  and the salt adds just a little something extra.  I love that I can bake up a whole batch at once, or grab just a couple for a snack or meal.  For me, a spoonful of sour cream is the perfect way to finish these off.

I know I'll probably always have these in the freezer (I have a batch there now!).  I hope you all get a chance to taste these in the near future!  It's highly probably that various friends reading this post will receive these at some point.  :)  Have a great week!!

Allison


Tuesday, June 11, 2013

Allison: Father's Day and The Perfect Cookie

Hello, and welcome to my third week of posting IN A ROW!  Okay... I'll stop counting.  Let's just assume that I'm back to posting at least once a week.

This week, I wanted to post early in case anyone is totally stumped on what to gift the important fathers in their lives.  I was pretty stinking proud of myself for coming up with the "Cookie of the Month Club", which I wrote about in last year's Father's Day post.  If you missed it, hop on over there and check it out.  Basically, I made a batch of cookies each month, and mailed my father at least a dozen of said cookies, with a little label attached, and a picture of my adorable little one.  The cookies were "from her", though obviously mom did the work.


I really enjoyed creating these packages each month.  I don't always get the chance to communicate with my amazing father as much as I'd like, so this was a great excuse to "correspond" with him regularly.  I only missed one month (April, I think), but made up for it with two packages the next month.  From what I can tell, he's really enjoyed having the packages arrive at his office each month (I don't think my brother, who works with him, is complaining either).

Hard to believe, but I just finished my last batch of "Grandpa's Cookies", as my two-year-old calls them.  Just for the record, your little ones will enjoy this gift as much, if not more, than the person receiving it!  Isla was a great sampler for me each month, and never had anything bad to say about my cookies.  :)  This month, I was scouring my Pinterest "cookie" board, and couldn't find one I was really excited about.  There was an intriguing half chocolate cookie, half peanut butter cookie that I was tempted to try, but the refrigeration time didn't correspond with my slim window to get to the post office before nap time.  But while on Sally's blog over at sallysbakingaddiction.com, I came across a recipe she calls "THE Chocolate Chip Cookie".  I've never been a huge fan of Chocolate Chip Cookies (I know... I'm the only one...), but I figured a traditional cookie might be a good ending to a year of cookie recipes.  So, I gave it a try.  OH MY GOODNESS!!!!!  For someone that's not a fan of this type of cookie, I admit that this recipe is amazing!  They turned out nice and plump (not flat like most), chewy and moist.  I LOVED her suggestion to add a few chocolate chips to the top of the dough (before baking) to make them more attractive.  I think she and I would be great friends.  :)


I followed her recipe found here to the "T", and found that they turned out just as she pictured.  My only deviation, if you want to call it that, is that I used my cookie scoop.  I LOVE using it for drop cookies, and find that it makes them almost perfectly round with a little less work on my part.  Lazy... don't forget.  :)


Sally described this as her "go to" chocolate chip cookie recipe, and I know it will definitely be added to my favorites.  I hope you all try it out.  I also hope you might consider adding someone special in your life to the "Cookie of the Month" club.  I can't believe it's been a year since my dad's "induction", and definitely plan to send him an occasional package in the future.  He has always been the most supportive and accepting father, always willing to offer inspired advice and to lend an ear to my silly problems.

On top of being lazy, I'm also cheap.  So when I card shop for holidays like Father's Day, I almost can't stomach spending what they charge for cards that seem to be less and less creative each year.  So when I found a similar card on Pinterest, as the one I made below, I knew I had a solution to my card dilemma.  I laughed so hard when I saw this card idea!  It took me about 10 minutes to make my own on my computer, print it off, and put it all together.  I think my dad will get a good laugh, and then have to admit to himself that it's completely true.  :)


Of course I admitted in the card, that my mom had a lot to do with my awesomeness too.  :)

Before I end my post, I have to take a second to give a "shout out" to my second favorite father... my amazing husband, Brent.  The minute he gets home from work each night, my VERY energetic two-year-old instantly wants to play with her daddy, and he always complies... even when his day has already been exhausting.  He's my best friend, and the best daddy I could have possibly imagined for my little girls.  My expectations were pretty high, after having an amazing father, and Brent definitely met that standard.  I love your guts, Brent!


I hope you all have a great week, and look forward to spoiling the men in your life.  Until next week...

Allison


Friday, June 7, 2013

Allison: Cara's Shower and Fruit Salsa

Hello, everyone!  No one have a heart attack... this is my second week in a row posting.  I just finished hosting my third baby shower in two months, and finally have a second to breath and LOTS of material to use for posts.

My church congregation has A LOT of pregnant women right now.  I think I counted 8 babies due to be born between May and July.  Crazy!  A number of these girls were having their second babies, and assumed they wouldn't have showers.  But one of my good friends convinced me to have a shower for my second, though I didn't think it was needed (especially having a second girl).  But it was really fun to celebrate this second little one joining our family, and I was grateful for all the cute little clothes and gifts that would be just hers... not shared by her sister.  Being the middle of five girls, I'm a little sensitive about hand-me-downs.  :)

So it was now my chance to pay it forward, and convince more moms-to-be (for the second time), to celebrate their coming babies.  It took some doing, but I was able to convince three of them to let me throw them showers.  I didn't necessarily set out to throw that many showers, but each of these women deserved this celebration and I wanted to make sure they had it.

Shower invite.  I love Power Point (aka Poor Man's Photo Shop)!
Cara was the first to deliver in this next batch of babies.  This was her first girl, and I was so excited that she was willing to let me plan her shower.  (I have to quickly thank Melissa for hosting the shower at her home.  She was so gracious, and let me totally take over her house for a couple of hours.)  I immediately thought of the theme "Sugar and Spice" when Cara said how much she loved everything girly.  I still remember the rhyme I used to read in a book growing up:

Sugar and spice and everything nice
That's what little girls are made of.

The Food:

I need a theme when I plan anything, to help reign in the options.  With the "Sugar and Spice" theme, I decided to plan foods with opposite flavors.  For example:  spice cupcakes and vanilla cupcakes, spicy turkey and sweet ham (for sandwiches), sweet kettle corn and white chocolate peppermint popcorn and spicy salsa and sweet fruit salsa.


I don't know why I had never tried fruit salsa with sugared tortilla chips before!  It was so good and relatively easy.  I used this version on allrecipe.com as a foundation, but ended up tweaking it a little.  Remember how I'm the lazy sister?  Well this is my lazy version.  :)


Ingredients:

Salsa-
3-4 red apples (1 green for color)
pint of strawberries
2-3 kiwis
lemon juice

Chips-
small flour tortillas (fajita size)
melted butter
cinnamon sugar


I followed the allrecipe.com version for the chips, but brushed melted butter on each tortilla with a pastry brush instead of using cooking spray.  I also cut my tortillas into sixths before I coated them with butter.

For the salsa, I only used apples, strawberries and kiwis.  The quantities really depend on how much you want.  I ended up adding more kiwi and a green apple when I thought I was "done" to add a little more color.  I also chopped each fruit into very small pieces to give it even more of a salsa effect.  I then squeezed in a good amount of lemon juice and tossed the salsa until everything was coated.  This kept the apples from browning.  I made the salsa the night before, and it kept well until the morning shower ended.


I think of everything at the shower, the fruit salsa may have been the biggest hit.  The cinnamon-sugar chips complemented the tart salsa perfectly.  Despite the chips coated in butter and sugar, I definitely felt relatively guilt-free since I was consuming fruit at the same time.  :)  I hope you all get a chance to try this treat at some point.  It was fun to make and fun to share.

Cara was spoiled at the shower, and is now enjoying her sweet baby Abigail.  Next week I'll share more of the shower decor.  Until then... have a great week!


Allison

Tuesday, May 28, 2013

Allison: Second Annual Girls' Weekend

Hello again!  Sara's recent post motivated me to finally post again.  I know how busy Sara is with prepping for a big move, so if she can find time, so can I.  This post will be dedicated to the "Sisters" part of "Five Crafty Sisters".  I promise to address the "Crafty" part next time.  :)

We, the Platt sisters, just had our 2nd annual Girls' Weekend, this last month.  Most of us (all the contributors of this blog) met in Utah and spent 3 days and 2 nights chatting, eating and spending time together.  It was so much fun, and made me even more homesick for family.

This year, our mother was able to join us, and brought our father as a travel buddy.  Our first night all together, we had a family barbecue and enjoyed time visiting with lots of nieces, nephews, in-laws and siblings.

The Girls
Mama Platt, Micky (SIL), Allison, Shauna (& baby), Lisa, Sara

Who's that girl ruining all the photos?!  :)

Sorry, Shaun... I love this picture!  

"Salt and Pepper"


The Boys
Briant (brother), Papa Platt, Dave (BIL), Rich (BIL)


It was fun to see everyone and to be reminded of what an amazingly fun family I have.  It also made me even more excited for our family reunion this Summer!

The rest of the weekend was spent talking some more, eating and eating and eating.  We even got to throw an almost surprise baby shower for Shauna.  She finally figured out something was happening as we tried to shop for baby clothes while she was with us.  We weren't very subtle.  :)

Quality cell phone picture.  Probably should have had her sit
on the opposite side of the table.  Oops!

As we ate some delicious breakfast food, we talked about the future of this blog, and how much we've enjoyed contributing.  As life gets busy, babies are born and technology doesn't always cooperate, we might not be as consistent as we once were, but we're trying.  :)


I LOVED spending time with my sisters and appreciate our individual personalities and points of view. I'm committing now to post more regularly.  We'll see if it happens.  Have a great week!


Allison

Monday, April 1, 2013

Allison: 20,000 Views' Giveaway


                          **************** GIVEAWAY IS NOW CLOSED ****************

Hello again!  Doesn't that cupcake from Sara's last post look amazing?!  Mmmm... Okay, I'm back.  Our humble little blog has been running now for almost a year.  Crazy!  I have loved posting about my creative ventures, and sharing this space with my sisters.  We just recently passed our 20,000 views' mark (can you believe it?!), and I can't think of a better way to show our appreciation to loyal readers than with a giveaway!


It's already broken 90 degrees here in Arizona, so it got me thinking about my most frequently viewed post: the Car Seat Cooler Tutorial (found here).  Having been viewed over 1800 times, I thought it would be fun to give one away this week.  All you have to do is post the answer to this question below:


*************************************

What is your favorite Summer craft?

*************************************

Post your answer to that question by Friday at midnight, and you'll be entered to win a car seat cooler of your own.  The winner will be announced Saturday morning.

I will hopefully be selling these practical little "coolers" in our Etsy shop soon.  Everyone have a great week, and a HUGE thanks for supporting our little blog!


Allison


Tuesday, March 26, 2013

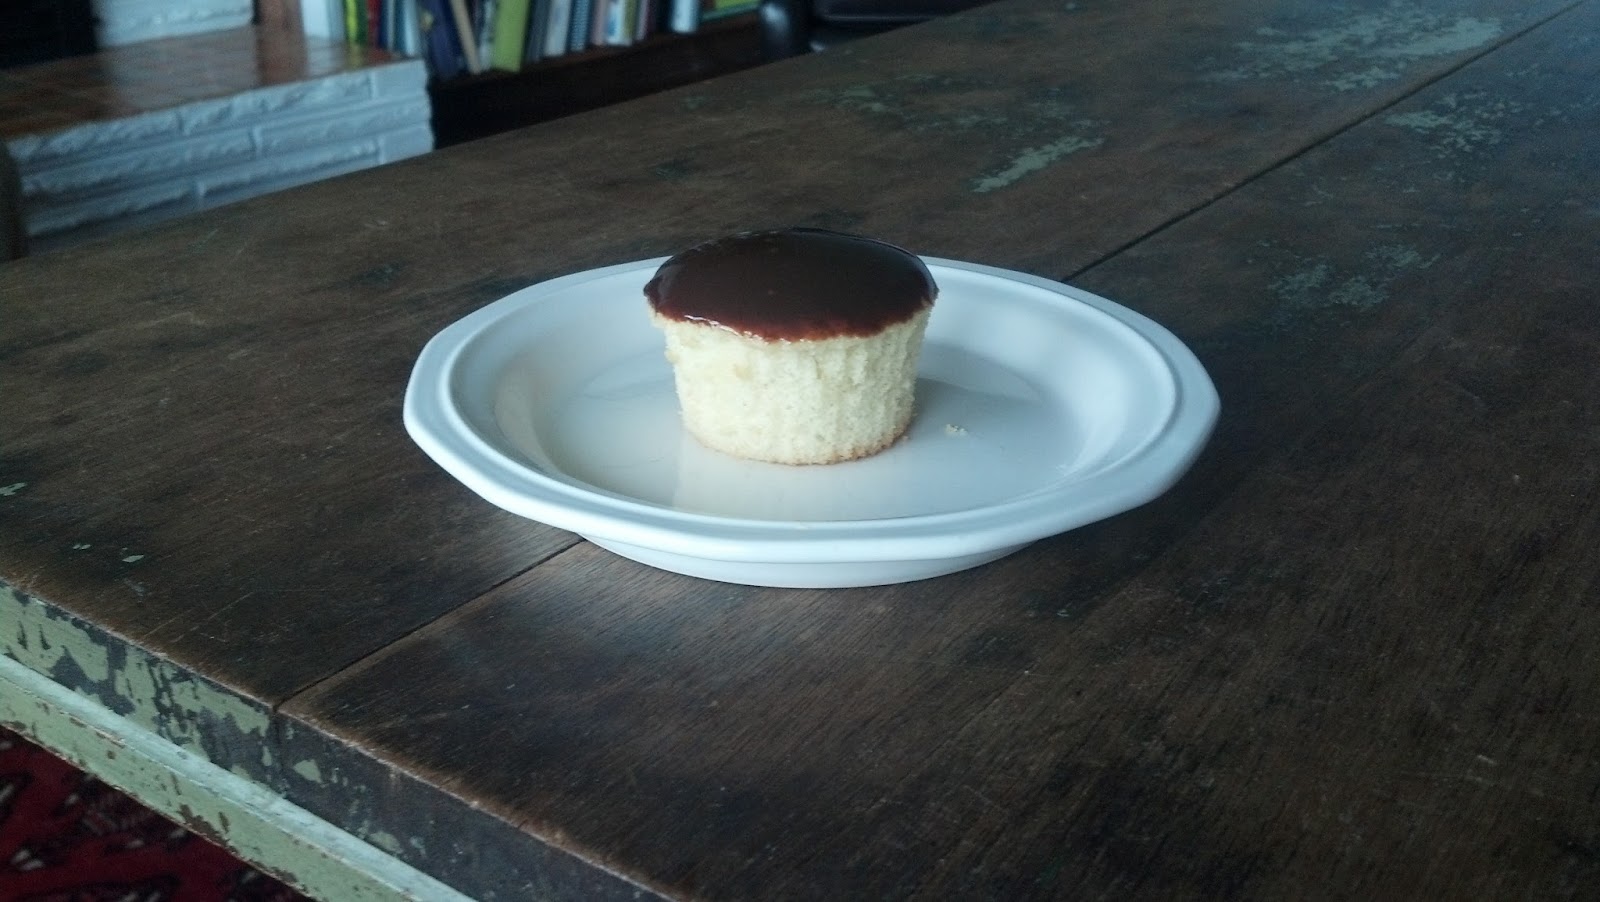
Boston Cream Pie Cupcakes

Have you ever tried a recipe that was just so delicious that you wanted to share it with the world?  Well, I have one of those oh-my-goodness-this-is-amazing recipes.  I found the original recipe here on Ms. Martha Stewart's site (so of course it will be heavenly, right?).  Enjoy!


BOSTON CREAM PIE CUPCAKES

Directions for cupcakes:


Ingredients
  • 1 1/2 cups all-purpose flour
  • 1 1/2 teaspoons baking powder
  • 1/2 teaspoon salt
  • 1/2 cup whole milk
  • 6 tablespoons unsalted butter, softened
  • 3 large eggs
  • 1 cup sugar
  • 1 teaspoon pure vanilla extract
  • Vanilla Cream (directions at the bottom) - I doubled this recipe to ensure I would have enough cream for all 20 cupcakes this recipe made.  I was glad I did because we ate the extra cream :)
  • Chocolate-Ganache Glaze (directions at the bottom)
Directions:
  1. Preheat oven to 350 degrees. You can either butter and flour a muffin tin or do like I did - use cupcake liners.  Whisk together flour, baking powder, and salt in a small bowl. 
  2. Beat eggs and sugar with a mixer on high speed until thick and pale, about 5 minutes. Beat in dry ingredients.
  3. Bring milk and butter to a boil. With mixer on low speed, add milk mixture to batter, and beat until smooth. Add the vanilla. Divide batter among muffin cups, filling each halfway. Bake cupcakes until light gold, about 15 minutes. Let cool in tins for 10 minutes, then transfer to wire racks. Let cool.  When my cupcakes were cool, I then took the paper liners carefully off of them.
  4. On the Martha Stewart site, she cuts the cupcakes in half and puts the cream in the middle.  That is a bit too messy to eat for me so instead I put the cream into a pastry bag and pipped the cream into the cupcake.  It was super easy and very nice and tidy.  After the cupcakes were all filled, I dipped the top into the ganache.  I had a bowl of extra ganache on the side for those who like a little extra chocolate.

Directions for Vanilla Cream

Ingredients for Vanilla Cream:
  • 2 large egg yolks
  • 1/4 cup sugar
  • 2 tablespoons plus 1/2 teaspoon cornstarch
  • Pinch of salt
  • 1 cup whole milk
  • 1/2 teaspoon pure vanilla extract
Directions
  1. Whisk yolks until smooth. Mix sugar, cornstarch, and salt in a medium saucepan over medium heat. Add milk and start whisking. Cook, stirring, until mixture begins to bubble and thicken, about 5 minutes.  Make sure to keep stirring because the bottom of this mixture can burn easily.
  2. Pour 1/3 of milk mixture into yolks, whisking constantly. Return egg/milk mixture to saucepan, and cook over medium heat, again, stirring often, until thick, 2 to 4 minutes. Stir in vanilla.
  3. Pass vanilla cream through a fine sieve into a bowl (I didn't do this and mine did not turn out too lumpy). Press plastic wrap directly on surface. Refrigerate until cold, at least 1
    hour, or up to 2 days.

Directions for Chocolate-Ganache Galze:

Ingredients:

  • 2/3 cup heavy cream
  • 6 ounces semisweet chocolate, finely chopped
  • 1 tablespoon light corn syrup

Directions:

  1. Bring cream to a boil in a small saucepan.Remove from heat, and add chocolate and corn syrup. Let stand for 5 minutes. Whisk until smooth. Transfer to a bowl, and let cool, stirring often. I let my ganache sit for quite a while before dipping my cupcakes into it.